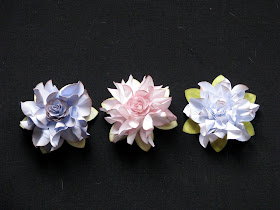
Here is a smaller, easier flower than my elegant ruffled flowers... for those who like the tattered look (and don't have the patience to do the other ones, LOL). They are more "forgiving" that the ruffled ones, a lot easier to manipulate and so much faster results. My flowers are 2 inches in diameter, using 1 and 2 inch flower punches (but use any die cuts you have). It's a great way to use your scraps since you don't need a lot of paper!

Here is what you need... 3 medium flowers, 3 small flowers and something for leaves (a green pointed petal flower works well), tweezers, water mister and glue. I lightly pre-inked the edges.
Step 2: Immediately unravel and use tweezers to gently twist each petal and push towards the center. Before removing tweezers gently pinch in place. Also mist the 3 small flowers and do the same twisting (they are too small to crinkle and there is no need). Let them all dry now.


Step 3: Gently unravel the medium flowers and 2 small ones. For the last small one, squish the petals together and pinch the bottom - this will be your center.


Step 4: Assemble your flower by off setting the petals as you glue. NOTE: you can omit the the pinched center and add a brad or gem instead if desired.

Step 5: Once it is glued, squish the entire flower towards the center to give the crinkle effect and then glue on the "leaves" if you wish.


NOTE: you can also use this type of flower center in my ruffled flowers as pictured below in the larger white one. Experiment and have fun! Add chalk ink, Glimmer mist, Stickles etc. for more sheen and dimension too! All I ask is that you please give credit where due (to ANY artist) because tutorials take a lot of time to produce. Thanks!
 NOTE: the smaller white one pictured above is the result if you don't do step 5 and squish the flower towards the center once glued. It looks more like a Prima Camelot flower that way.
 NOTE: the smaller white one pictured above is the result if you don't do step 5 and squish the flower towards the center once glued. It looks more like a Prima Camelot flower that way.
Well, although I have a lot more flower tutorials up my sleeve... I need to take a break because my August SCRAP THAT! DT kit just arrived (it's gorgeous!). I have lots of work to do before the project reveals on July 26th.


