With simply paper and creativity anyone can create art


Wednesday, August 25, 2010

Scrap That! Kit Reveal (& blog candy)

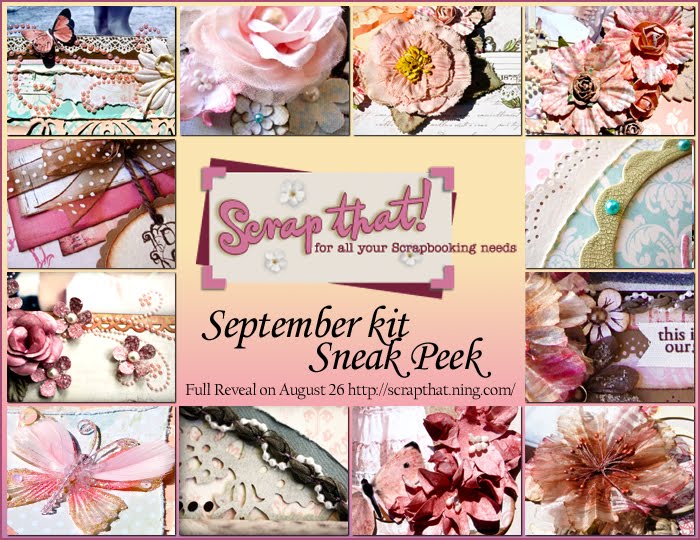
Let me start off by saying the mix of papers in the Scrap That! September kit are glorious to work with. This kit has a fun something old, something new, something blue, vintage kinda feeling to it. The kit features papers from the Shabby Green Door "wings of a dream" collection plus papers from My Mind's Eye "lush" and "bella bella" collections. There are tons of great embellies like Prima flowers, Green Tara flowers, Zva flourishes, Stickles, lace, velvet ribbon and even a jar of Ranger crackle paint! This is truly a designer's dream kit.

My first layout "Smile" is me at about 6 months old. I used my newly purchased MS punch - love it, did a little tearing and paper rolling, added tons of flowers and gorgeous velvet ribbon. The only thing from my stash were the little cream flowers on the circle. I just love these Shabby Green Door papers!


Design Tip: roughly pleat and glue thick ribbon under a circle to "anchor" the page.

The second layout "sweet girl" is a picture taken at the hospital the day my girl was born - with all my kids together. There was a lot of ugly stuff in the background given it was taken in a hospital room so I designed the layout around the circular picture I cut out. The white acid-free paper crafting doily was from my stash (available through my Etsy at http://www.etsy.com/shop/vickyalberto) and the two smaller flowers were from the Scrap That! August kit. Gotta love the Prima and Zva products in this month's kit! So much distressing on this layout too!


Design tip: Layer papers doilies and crochet/ribbon items for tons of texture.

My third layout "Always Love You" is my oldest son feeding his baby sister. He has always been so good with her and loves her to death! The pink apple blossom flowers on this page from Green Tara are so cute and that MME paper frame was a perfect touch for this kit. Note: The two pressed wood flourishes were from my stash (available through my Etsy at http://www.etsy.com/shop/vickyalberto) and I just glimmer misted them in Cream de Cocoa color.


Design tip: Stamp, scrunch and ink paper to give it a vintage feel including rolling the paper edges to finish the tattered look.

My last layout "precious" is my daughter who fell asleep on me in a photo shoot. Since this MME paper had a beautiful border, I decided to keep it simple and just add a few tears. The only thing on this one from my stash was the butterfly glimmer chip (again from one of my Etsy kits)... I even used the Stickles included in the kit.


Design Tip: Make a freestyle bling flourish by using distress Stickles.

Thanks for stopping by and don't forget to scroll down to the previous post and enter to win some BLOG CANDY! The winner that is randomly drawn on September 7th gets one of my Etsy kits of their choice plus I will add some little goodies from the September Scrap That! kit too.

Sunday, August 22, 2010

Blog Candy! Easy to WIN!

To celebrate my Etsy opening, I am hosting a blog candy giveaway and the winner gets to choose one of my kits as their prize, plus I will include a few little embellies from the upcoming September Scrap That! kit. Here are just a few examples of my Etsy kits... but please visit the shop listed under my full name vickyalberto at http://www.etsy.com/shop/vickyalberto to see all that is available. Read the details in this post to find out how to win one too!

VICTORIAN SKY - $8.75

All the kits feature a handmade flower and acid-free paper crafting products. My goal is to offer high quality items at reasonable prices. I have taken great lengths to ensure all items are archival safe for scrapbooking - especially when it comes to paper doilies.

THE HERITAGE - $8.75

A lot of the products are unique finds like crocheted lace & flowers, others are popular brand name items such as Prima & Tattered Angels. Some of us love certain products but can't justify buying the full box or spool it comes in. Now, you can buy a little bit of everything to your taste for that special project. Plus, adding a second kit to your order only costs and extra 25 cents!

BABY GIRL - $8.75

Each kit is designed to embellish two scrapbook pages and they come in a variety of themes. Every new customer gets an extra embellie added to their kit too!

BABY BOY - $8.75

So how do you win a kit of your choice?

Simply go to my Etsy shop at http://www.etsy.com/shop/vickyalberto to view all the kits listed so far... then, come back here to my blog and leave me a message telling me:

1. Which kit you would like to win and why you like it the best
2. What kinds of embellies (i.e. flowers, bling, chipboard etc.) you use the most in your crafting projects
3. Don't forget to become a follower of this blog too!

The winner will be drawn on Tuesday, September 7th, good luck!

In the meantime, check out this sneak peek collage of the upcoming September Scrap That! kit projects to be revealed by the design team (this week on August 26th). This kit has been a BLAST to design with and I think my FAVE so far.


Friday, August 20, 2010

Diva Feather Flower Tutorial


I am soooo happy to be a feature artist and contributing artist for Ideas for Scrapbookers this month. I have seen most of my scrappy idols featured on that site and still can't believe Pam Callaghan is featuring ME! To celebrate this event I have a new layout of my daughter at 6 months "beautiful" (using old MME papers from my stash)... and a brand new flower tutorial "Diva Feather Flowers" that I created for her blog post today.

This layout also features embellies from my Etsy shop NOW OPEN! My shop is listed under my full name vickyalberto at http://www.etsy.com/shop/vickyalberto. What an exciting month!


Here is a close up of the feather flower and the tutorial is described below. Don't you just love these chunky pressed wood flourishes and shabby little blue flowers too?

Design Tip: Simply use chalk ink on wood or plain chipboard to give it a rustic feel.

OK, so I was inspired to make these diva feather flowers when I was thinking back to my aunt Lucy's little feather slippers... you know the kind I mean... the ultra sexy slinky kind.

To get started you'll need 7-8 short craft feathers, one medium and one large punched paper flower (any die cut with separated petals will do), tweezers, water for misting (or color mist instead of inking the edges) and glue. My flowers are 2 and 3 inches for these. You'll also need a brad or decorative center of choice.

Step 1: As with most of my flowers, ink the edges and then slightly water mist. Using your tweezers, twist and push the petals towards the middle then give it a slight pinch into place. Let completely dry.

Step 2: Slightly unravel the petals of your flowers and glue feathers in the petal separations of the larger flower. Let dry.

Step 3: Glue the medium flower onto the large feathered flower and then also glue a few feathers to fill in blank spots. Let dry.

Finally, add your brad or decorative center and you're done!

Hope you enjoy making these fun little embellies and thanks for stopping by. Don't forget to leave me a message... I sure do appreciate it, thanks!

Thursday, August 19, 2010

My wedding Night

I've been sitting on this layout idea for a while and finally stuck it down. I used mostly items from the Scrap That! July kit. This is a picture taken on my wedding night at 11 pm. We were sunburnt, tired and windblown - and it's one of my faves, LOL.

I kept it simple in terms of embellies and used traditional and water methods of distressing. I also finally had an excuse to use my new music stamp too!

Design Tip: To achieve rugged distressing, heavily use an edge distressing tool, then wet the edges of the paper with your fingers (the wetter the more distressed it will look)... then start crumpling as you wish. Once dry I add ink for a grunge look.

Friday, August 13, 2010

The Scrap That! “Say See ‘Ya Later” to Summer Sale!

If you love online shopping (and who doesn’t?) you are going to LOVE this! Scrap That! is having a sale! Everything in the store has been generously discounted 40-70%. (Prices are already marked down on the site)


Did you know?

Shipping rates are the lowest in Canada?

No Sales Tax?

*FREE shipping on orders over $100?

We offer local pick/ up and delivery options in the Calgary area?


A Message Regarding the Scrap That! Kit Club

All subscription renewals, and all new subscribers received between Friday, August 13th (a very auspicious day) and September 3rd, will be entered into a draw to win a Zutter Distrezz-It-All! This handy little gem is something ALL scrappers should have!

Saturday, August 7, 2010

Simple mini flower tutorial

Here is a simple flower tutorial for those in a hurry... no punches or ink required.


All you will need is 4 store bought paper flowers - 2 tiny ones and one small one for the flower, then another small green one for the leaves... plus glue, water to mist and a pen or pencil.

Step 1: glue a tiny flower to the small one and let dry.

Step 2: Lightly water mist the single and double layer flowers then cup and roll around the end of your pencil. Let dry.

Step 3: Pinch the single flower to create your center.

Step 4: Glue the center into the double layer cup and then the "leaves" flower to the bottom.
Seriously, you're done! If you like these flowers, please leave a message and let me know you stopped by.

Wednesday, August 4, 2010

My Etsy shop will open soon!

If all of my items arrive on time, I should be ready to open my Etsy shop in a mere two weeks. I will be featuring reasonable priced embellie kits full of archival safe flowers, crochet lace, acid-free paper doilies, chipboard, pearls, brads, wood swirls, leaves, mulberry paper and so much more. This is just to start... I'll be adding so many more cool items in the coming months. Here is a sneak peek at just a few items because there are way too many to show.


Tuesday, August 3, 2010

August Scrap That! kit

The August Scrap That! kit is now available for purchase! It features the Girl's Paperie - Paper Girl collection and sooooo many glorious goodies. Check it out before it is sold out!

The embellie add-on kit, love that Prima!

On top of all the great goodies in the August Scrap That! kit and the embellie add-on kit, check out this SECOND fun add-on featuring cool ribbon, flowers and buttons...

August "Buttons Blooms and Bows" Add-On Kit

Sunny, Breezy, Bright and Cheerful describes the Scrap That! August “Paper Girl” Collection featuring gorgeous double sided patterned papers from The Girls Paperie.

We have created a special add-on for this kit that perfectly compliments these exquisite papers. Included are one full pack of Prima Acapulco mix Pinata Petals, a selection of Fancy Pants Roadshow buttons, and six yards of unique high-quality ribbon, priced at $13.99.

You'll need the paper add-on kit for this kit too, trust me! Look at my last post, I might have only used half of the embellies on 5 layouts!

Sunday, July 25, 2010

August Scrap That! Reveal

I'm leaving for a mini holiday tomorrow so I'm posting this a little early. The August Scrap That! kit is SOOOO packed that when I received it I didn't know where to start. This will be a long post since I did 5 layouts and STILL have loads of embellies from the add-ons to play with... good thing I have the paper add-on to use all of them up later! This kit featured the Girl's Paperie, Paper Girl collection and a TON of fabulous goodies to play with.

This first layout is me as a wedding flower girl at almost 5 years old but I was the size of a three year old... hence the French "Trois" title. The picture is horribly faded but it is the only one I had and really wanted to do this shabby chic layout for my parents.


The flowers are my handmade ruffled and shabby ones and the tutorials can be found in the right sidebar of my blog.

This kit had amazing Prima butterflies and ribbon. Please note the white square doily was from my stash that I bought at Michael's.

Design Tip: Use ribbon to create a frame around a title plaque (which can be cut from patterned paper).

My second layout "Little Darling" is my daughter last summer. I had bought some Dusty Attic gates (bought from www.staytruetogod.com along with a lot of other goodies) and I had to scrap this perfect picture for the gates with the floral paper in the kit. I used the terrific sketch by LG Belarmino included in the kit as inspiration (just flipped it). I loved the clean lines appeal to it.


I made the large shabby rose and small dark pink buds (tutorials to follow soon). The other light pink flowers were not handmade and will be sold through my soon to open Etsy shop in the Fall.

Design Tip: Cluster blooms on floral paper for a beautiful finish.

My third layout "sweet" is me again. As soon as I saw this paper I ran to my mom's and stole this framed picture in her kitchen (scanned and returned the original). The paper matched my dress too well not to do this layout.


Amazing Jenni Bowlin butterflies and Prima pearls included in this kit.


Here are more of the flowers that will be available through my Etsy shop opening in the Fall.

Design tip: cut florals out of a pattern and place flower embellies for a 3-D effect.

For my fourth layout "Sweetheart", yes me again (working on getting some stuff done for my parents)... I went for a homespun look since again the picture was not a great one (but camera's were horrible in the 70's). Again I used some of my flowers. Included in the kit was this great blue ribbon and stunning pins so I just attached the ribbon with the pins instead of glueing. Please note the pink paper is from my stash.


Design tip: try making origami embellishments to add a fun interest to layouts.

And for my final layout "the Pout", this is my son after getting in trouble while camping last year. I wanted to do a cutesy layout and I modified the blue die cut paper to better suit the layout. Included in the kit were adorable buttons and I had saved a portion of the Prima swirl from my "sweet" layout for the umbrella handle. Please note the orange paper is from my stash.

Design tip: Create your own embellies by cutting shapes out of cardstock.

I used some Martha Stewart daisies from my stash... but I plan on making these easy blooms in the future with a flower punch and craft pom poms from now on.


Well, I hope you enjoyed these layouts and I will be back to check comments at the end of the week when I get into town. Hopefully I will be able to work on some flower tutorials next week too. Thanks for all your support, i really appreciate it!