
As promised, I am going to do an easy folded flower tutorial as seen in one of my recent May Scrap That! kit layouts. At the end, you'll have a two-layer, 6-petal flower as shown below. The beauty of these flowers is that you don't need double sided paper (like you do with most other folded flowers). This is not a new concept and I cannot take credit for inventing this flower... I found it a long time ago on the internet along with other folded flower tutorials that I will be providing in the near future.

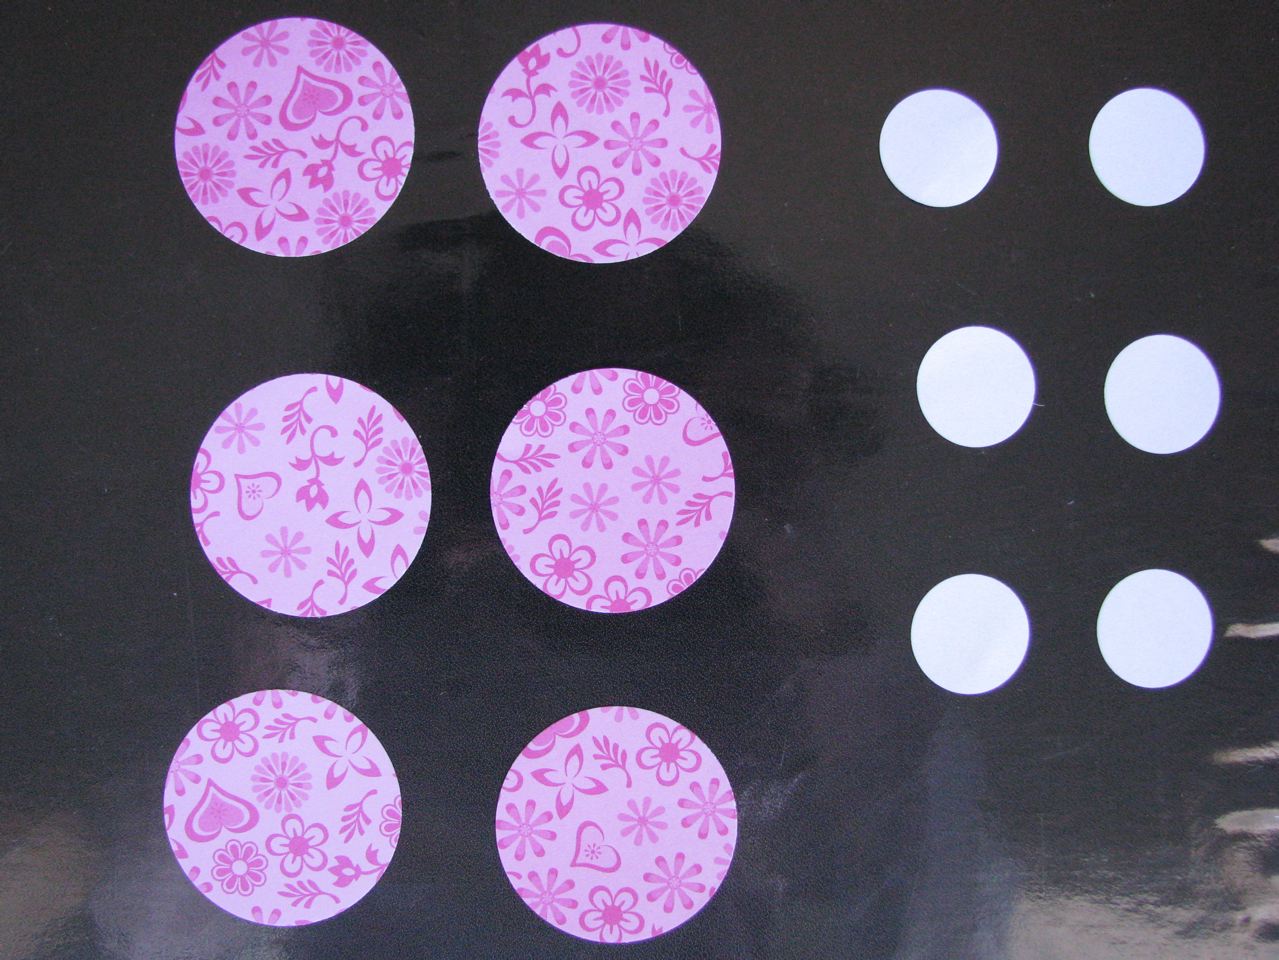
Step 1: Punch out 6 large circles and 6 small circles. I used a Fiskars and a Creative Memories Punch.
 Step 2: Fold the circles in half with the pattern (that you want showing at the end) on the inside and then fold up the bottom a third of the way up. Make sure that all of the circles are folded the same way. Mine I do with the curve facing left as shown below.
 Step 3: Unfold back to a semi-circle position and use the crease that you just made as a guide to "open the petal".
 Step 4: Repeat this for all 12 circles.
 Step 5: Glue your flower layers together by glueing one bottom "flap" to the back of a petal at a time, until all of them have been added. I find that using a glue stick is less messy and works best so that if you need to adjust the petals to be spaced more evenly at the end... then it allows you time (since it dries slower than other adhesives).
 Step 6: I ink the edges before glueing the two layers together and then finish off by adding Stickles to the centre or a brad.
 That's it! You can also make this a 7 or 8 petal flower if you like a more crowded petal look. Enjoy!


16 comments:
Thank you so much!!! These flowers are Gorgeous!!!!!!!!!
Thank you so much, Vicki! I waited sooo long for this! I couldn't figure it out for the life of me!!! You Rock!
Super cute! Thanks!
Wonderful & fun technique!! Thanks for showing us!!!
Thanks for this great tutorial Vicky! Im adding it to my tut list on my blog!! Tab
super cute, going to have to try this.
Thanks so much for sharing this. I will try this out for sure.
I'm going to try this today-it looks adorable! I think a future tutorial would be helped by having a picture of the back of the flower so less-adept crafters like me can see how it goes together "behind the scenes."
This is such a cute flower! Thanks for the tutorial.
I love the flower. Thanks so much.
what a fun flower! :) Thanks for the directions!
Made a card today using this fabulous tutorial. Thank you for sharing it!
Love them they are really nice for my projects...... Please post some more flat paper flowers..
Great for my cny school notice board deco
Thanks for guiding me about the folded flower tutorial Private tutor St. Augustine
Your artistic skills are great love this paper flower tutorial Private tutor Ocala
Post a Comment