How can you go wrong when you combine a beautiful Swirlydoos kit, with gorgeous Dusty Attic products, and stick it all down with Helmar adhesives? NOTE: I have provided a handy list of the various Helmar products I use for different tasks on these projects at the end of this post.
I have created 3 more projects with my Swirlydoos January "Whimsy" kit" which features a lot of Prima goodness. I rarely do multi-pics but this one was fitting of my daughter as a toddler. The flowers in the add-on kit were a perfect compliment to these papers. Click on images for larger views.
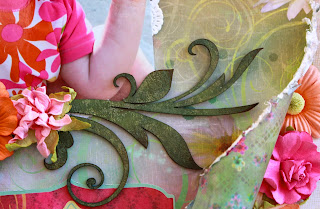
I cut up the Dusty Attic leafy flourish to put on either side of my flower cluster. I simply painted it with several Dusty in Colour green paints and then topped with a variety of green and brown Clearsnap chalk ink.
Thank you Clearsnap for sending the Helmar team such awesome products to work with! This is what they sent me (my choice!) - the Autumn chalk ink set... LOVE IT! Clearsnap chalk inks have always been a must-have in my scrappy stash.
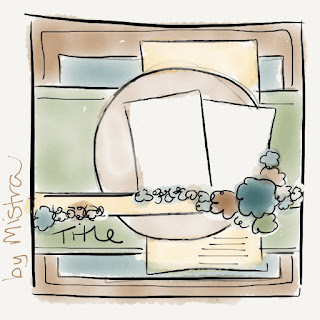
Here is the Prima January BAP sketch that I used as an inspiration starting point.
I thought it would be fitting to do a layout about achieving creative dreams. I have had the pleasure of designing for such fantastic companies. OK, I will be honest that purple is a very challenging color for me to scrap - but these Fabscraps papers in the January kit were just so beautiful with a hint of blue. I did some inking (using Clearsnap chalk ink) around all of the edges and layered some doilies.
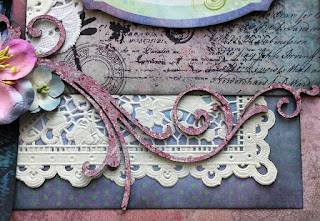
I have used the DA decorative scroll #1 and cut it into several pieces. I painted it with several gorgeous colours from the brand new "Dusty in Colour" release of acrylic paints. I simply splattered it all to give it an artsy feel.
Next I used some chipboard mini words for the title (again swiping here and there with Dusty paints) and then added a pretty butterfly from the newly released chipboard styles. I also added a few small "Dusty in Bloom" flowers to the gorgeous main kit flowers - a perfect match!
FAUX REVERSE CRACKLE (technique on the butterfly)
Step 1 - Generously stipple gesso onto chipboard and let dry (the paint "peaks" will settle a bit).
Step 2 - Let completely dry.
Step 3 - Dip your finger into chalk ink and gently rub over the textured bumps to highlight them
This layout was inspired by the fantastic Dusty Attic January sketch (I reversed it). Don't forget to enter each month for a chance to win some beautiful products!
Lastly I have created an origami purse (gift bag). The decorative handle is actually a part of a broken fairy Halloween costume that I "borrowed/recycled" from my daughter's closet.
Here is a close-up of the Swirlydoos main kit flowers surrounded by Dusty Attic leaves and a cute little DA butterfly too. I used the Silks paint in the kit and topped the butterfly with Diamond Dust glitter glass.
Here is a quick snap before assembling the purse. I used a traditional gift bag folding technique to get it to this point and then slightly modified it to create the purse flap. Here is a great YouTube video on how to do a regular gift bag.
Helmar products used in these projects:
Premium Craft Glue - for paper layers
450 quick dry - for flowers
Acid-free - for chipboard and to adhere glitter
Adhesive Runner - for photos
Zapdots - for raising titles/notecards and clasping the purse
Gemstone glue - for pearls and gems
Don't forget to check out the awesome projects on the blogs for the cross promotion between Helmar and Clearsnap!
Don't forget to check out the awesome projects on the blogs for the cross promotion between Helmar and Clearsnap!


