With simply paper and creativity anyone can create art


Friday, January 21, 2011

Feb. Scrap That! kit peek

The upcoming Scrap That! kit is sure to cure your winter blues. Amazing papers, beautiful embellies and versatile colors! Full DT reveal is Jan 26th but here is peek until then...

Thursday, January 20, 2011

Scrap That! Call for Designers

Canada's Best Kit Club is looking for 3 Guest Designers to join our team!

Scrap That! kits are unlike any others in Canada. Every month, we create an innovative kit full of carefully selected high-end double sided papers, specialty papers, premium embellishments and specialty items. We also include a collectable signature product, a scrapbook layout sketch and one technique product including instructions and tips on how to use it.

Each candidate will design for a two month term between April and September 2011. At the end of the term we will have a contest and let our members and subscribers vote on which of the three Guest Designers will remain for the rest of 2011!

Each Guest Designer Receives:
1. FREE PRODUCT - Two kits plus the embellishment add-on kit, valued at well over $50 per month
2. FAME & GLORY - Your photo and bio on our blog and our online social community!

What we ask of you:
- You must have a blog and update it regularly each week including posts about projects you’ve used from the kit, design tips etc. We ask that you also have links to our site on your blog and other sites where allowable.
- 4 projects created with the kit and 90% of each project must contain kit contents. 3 of these projects must be layouts and the third a project of choice (lo, card, altered item).
- Post your 4 kit designs in our gallery as well as to one other large gallery site, either Scrapbook.com or TwoPeasinaBucket.com. Postings on these sites must include *Scrap That! Kit* in the title line.
- Projects must be well photographed, cropped and ready to be uploaded on our site (and your blog) the 26th of each month.
- Weekly message board and gallery participation during the two month term is required. This is quite possibly the most important thing! We have started a great online community and our members are of the utmost importance to us, so this is huge.

This competition is open to the US and Canada only. Please e-mail 3-4 of your best layout creations along with the links to your blog and online galleries to layouts@scrapthat.ca by February 11, 2011.

scrapthatchat.blogspot.com

Tuesday, January 18, 2011

Jan Prima BAP layout

After all the bold red layouts for Dec. and Jan., I wanted to get back to pink so I gave the Prima sketch a go. This is my hubby with newborn daughter the day we brought her home. The Prima papers are flight of fancy and nursery tales collections.

Design Tip: Use beautiful manufacturer packaging as a layer in your layouts. The script paper behind the photo is Prima packaging.
Here is the Prima Jan. BAP sketch if you want to give it a go!


Monday, January 17, 2011

Pojjo's Blog Candy

I rarely post things like this but Johanna is a tremendous artist and is giving away an amazing blog candy package. You really need to check out her blog/work at http://pojjos.blogg.se.


Saturday, January 15, 2011

January Prima Palette and Product Pick

I decided to play along with the Prima palette this month (see image below) because I already had this baby frame half done... so it was meant to be! Most of the embellies are from past Scrap That! kits. I even painted my wood fence from the Ranger paint in the September kit. Those are actually my son's first baby booties.


This month brings us a gorgeous array of NEW soon-to-be-released CHA products filled with delightful touches that only Prima can produce! Just take a long look at these beauties:

  • special fabric-filled flowers (unlike anything else on the market)
  • the heirloom-quality flower centers
  • home-spun crochet touches
  • delicate laces
  • sparkling crystals
  • and fluttering butterflies!

Another Jan Scrap That! Kit Layout

I had to squeeze in another layout using my beautiful January Scrap That! kit leftovers. Actually, that will be 4 layouts I made and I still have plenty for another one but the Feb kit is already calling my name. This is my a looooong time ago sitting on my dad's GTO. He loved that car so much that at any given time it was so clean you could eat off it - seriously! It destroyed him to sell it when the recession hit in the 80's. I used another wonderful sketch by Amarilys (http://amadrian8.blogspot.com) for this one too!


Design tip: Double up on punched butterflies to give nice dimension with tone-on-tone layers.

I'll be back with another post in just a bit... the sun finally peeked out for project pictures today!

Monday, December 27, 2010

Scrap That! January Kit

I hope everyone had a very Merry Christmas. I am a day late with this post due to being really sick and hosting family in from Australia... but I tell 'ya this kit is nothing short of amazing. I was thrilled to get my hands on the outstanding MME Union Station papers (all 10 of them!) with fabulous embellies and cardstock choices. I have 3 layouts to reveal today and am working on a fourth one too. Can't get enough of this beautiful kit... I may even end up doing 5 layouts, LOL. The great thing about Scrap That! kits (www.scrapthat.ca) is that they are so versatile, always featuring classy papers and embellies, PLUS 3 matching plain cardstocks. I can usually get 4-5 fully loaded layouts out of one kit. Peronally, I can't live without the embellie add-on and ALWAYS have left overs even when I do 5 layouts. Lori is so generous and packs those kits well and the shipping is so reasonable.

For my first layout, "Swimsuit Pose", this is my daughter and I a few years ago. This was her first swimsuit, so cute!!! For this layout I used an amazing sketch by Amarilys (http://amadrian8.blogspot.com), it was a two-pager sketch and since I rarely scrap doubles, I just used the first page of it. The awesome butterflies in this kit complimented the papers perfectly and the Prima flowers so so perfect for this layout style. I have been waiting so long for the right papers to scrap these pictures and finally got them. Please note the bling flourish is from my stash.


Design tip: Place little flowers around a few large ones to create a beautiful cluster look.

For my second layout, "25 Cent Moments", I couldn't resist using the last little brown butterfly from the kit and the title tag was so perfect for this picture of my oldest son when he was just learning to walk. I kept this one simple to let the happiness of the picture and the beautiful papers shine. Those Prima flowers are so gorgeous IRL and I used some feathers in the kit to add even more softness.


Design tip: Use lace to create a textured mat around pictures.

For my third layout, "Charming & Adorable", again I was waiting for the perfect papers to scrap this picture of the boys when they were toddlers. I just loved their little bear snowsuits. I couldn't resist using "Suepup's" sketch 120410 for this one (http://suepup.blogspot.com). Now, see all those Prima embellies? Oh wow! All so very perfect for these papers. Please note, the wide red ribbon and two smaller flowers were from my stash.


Design tip: Use white doilies on a winter layout to give a crisp snowy feel.

Here is a shot of that glorious Prima butterfly!

Well, thanks for stopping by, I really do appreciate the visit... and check back soon for another layout in the next week. In the meantime, don't forget the check out the rest of the DT's work at http://scrapthat.ning.com/photo.

Tuesday, December 21, 2010

Reveal is only a few days away!

Check back the day after Christmas for the full Scrap That! January kit reveal... here is a little teaser in the meantime. I would like to wish everyone a very Merry Christmas - see you back here on the 26th!


Wednesday, December 15, 2010

Teacher Gifts

Each year I get the kids to help me make a special teacher gift (that can actually be used or displayed without embarrassment, LOL). Some tiny Prima flowers that I had ordered came in fabulous glass jars and display case. The packaging was plain, dark brown and the perfect background "canvas". I refilled the jars with Epsom salts as I am not sure of scent allergies. The kids helped me fill the jars and make the 3 large flowers using my Vintage Flowers Tutorial. Here is the result...

For the first one, I chose a Graphic 45 "Le Romantique" scraps, lace, string pearls and a soft pink ribbon. I also glued 3 pink shabby flowers to each jar . I used the ribbon to wrap it and tied a bow at the top and glued the large flower and tag to the ribbon so that it comes apart easily and the jars can be refilled.

For the second one, I chose G45 "Steampunk" scraps from my Oct. Scrap That! kit, and added a few "Romantique" tags tied around each jar. It looked a little plain compared to the first one so I added some adhesive pearls to dress it up.

Lastly, I used a Websters calendar page for the third one, then did some fussy cutting and glued a bird to the top of the flower to make it look like a nest.


Well, thanks for stopping by and for all the sweet comments you always leave.

Monday, December 13, 2010

Have you seen the ST mini?

Tara Orr designed an amazing album using the Scrap That! mini kit and best of all the Bo Bunny Noel papers are already cut to fit the chipboard! What an easy and beautiful project. Be sure to get one before they are all gone!


Here is Tara's album cover, all of the pages are posted at http://scrapthat.ning.com in the gallery if you want to check them out.

Thursday, December 2, 2010

Scrap That! Dec Kit Contents

Well, you've seen the design reveal, now here is a picture of the main kit and content details. The embellie add-on is already sold out so hurry fast before the kits are all gone too! Visit www.scrapthat.ca to purchase this kit or e-mail sales@scrapthat.ca to subscribe for 6 months and receive a discounted monthly price.


Scrap That!“Holiday Magic” Kit

Crisp white mornings, a cozy fire, twinkling lights, the smell of pine and fresh baking. Surrounded by family and friends, the holidays are a magical time of celebration. We are so pleased to present our "Holiday Magic" kit featuring the Night Divine paper collection by IOD. With rich, romantic colors, and floral elements, this collection transcends the holidays and can be used for themes such as, heritage, romance/wedding and Winter!

6 IOD Night Divine Papers
1 IOD Gold Music Notes Foil Paper
Bazzill Basics Forest Green Cardstock
Bazzill Basics AMM Barkley Cardstock
Bazzill Basics Birchtone Dark Cardstock
Daisy D’s Timeless Holidays Papers
1 Sheet IOD Night Divine Elements
1 IOD Night Divine Die Cut Pack
1 Bo Bunny Cranberry Rose Trim
1 Prima Gala Holiday Poinsettia
1 Prima Winter Branches, Grapes
1 Handmade Green Organza Flower - ETSY
www.etsy.com/shop/supplier
1 Ranger Stickles Holly
4 Prima Snowdrop Holiday Celebration Flowers
4 Bazzill Flower Pot Flowers - Red Carpet
3 Making Memories Mini Gold Brads
Length of Green Tara Lace
4 Pieces May Road Chipboard

Wednesday, November 24, 2010

Scrap That! December Reveal

I am so excited about this Scrap That! reveal. When you mix my favorite holiday with my favorite paper line released at the last CHA, combined with fabulous embellies... you get the perfect kit! The December kit features the Creative Imaginations IOD Night Divine collection and a wealth of gorgeous embellies. I couldn't stop scrapping and ended up with 5 layouts!

My first layout "Merry Christmas" is of a picture taken on my daughter's first Christmas. I wanted a simple and elegant feel so I double layered some doilies and made a big bow out of the stunning Bo Bunny ribbon. Heavy edge distressing and a simple IOD tag for the title to polish it off. All items shown are in the kit except the doilies. I loved the cardstock choices this month.

Design tip: Dress-up the middle of a bow with a flower for simple elegance.

In my second layout "Noel", this is me at almost 2 years old - looks exactly like my daughter at that age except for the black hair, hers is light brown. I scanned the picture to have a copy but used the original here because the photo finish went better with the vintage papers (see the "vintage" scratch on it? LOL). I made all the flowers using my new tutorials (winter roses and vintage style flower) to dress-up the prima berry vine. I added some of the kit's glorious trim around the circle and hung the title tag on the branch. The cheesecloth and two white leaves were from my stash.
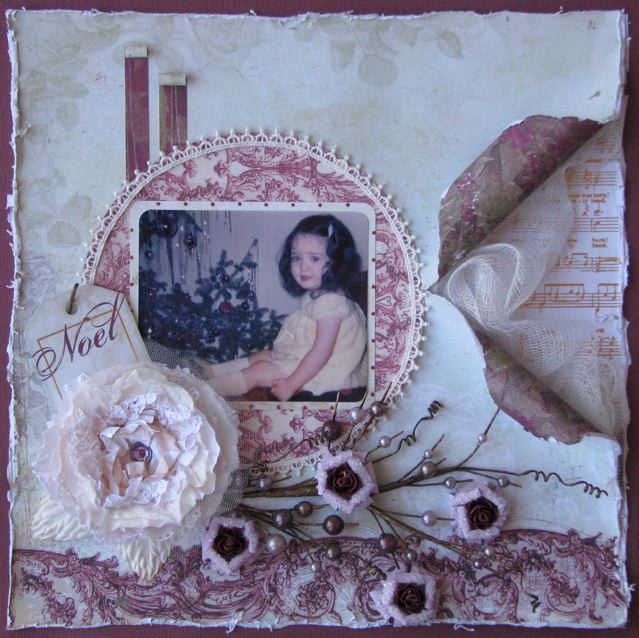
Design tip: Tuck some cheesecloth behind a deep paper tear to add soft texture.

In my third layout "Spirit of the Season", this is my family a few months before my daughter was born. I water distressed two layers then accessorized with so many beautiful embellies from the kit. The only embellie I used from my stash was a bit of lace. I used the wonderful sketch by our extremely talented team member, LG Belarmino.
Design tip: Create a shabby cut out circle edge by tucking some lace trim behind it so it faces inwards.

My fourth layout "Wonderful Time" is of my first son on his first Christmas morning. I used a scrip stamp to create the faded stamped background, then did a whole lot of edge punching and used more gorgeous embellies from the kit. The black chipboard frame was from my stash (from the October kit).
Design tip: Add Stickles to black chipboard to jazz it up a bit.

For my last layout, I had one piece of IOD paper, one piece of green cardstock and one green trim left from the kit. I wanted to make a pre-made layout for a good friend of mine so I added my own embellies and doilies for a really quick layout. The colours are perfect for her home's holiday decor.
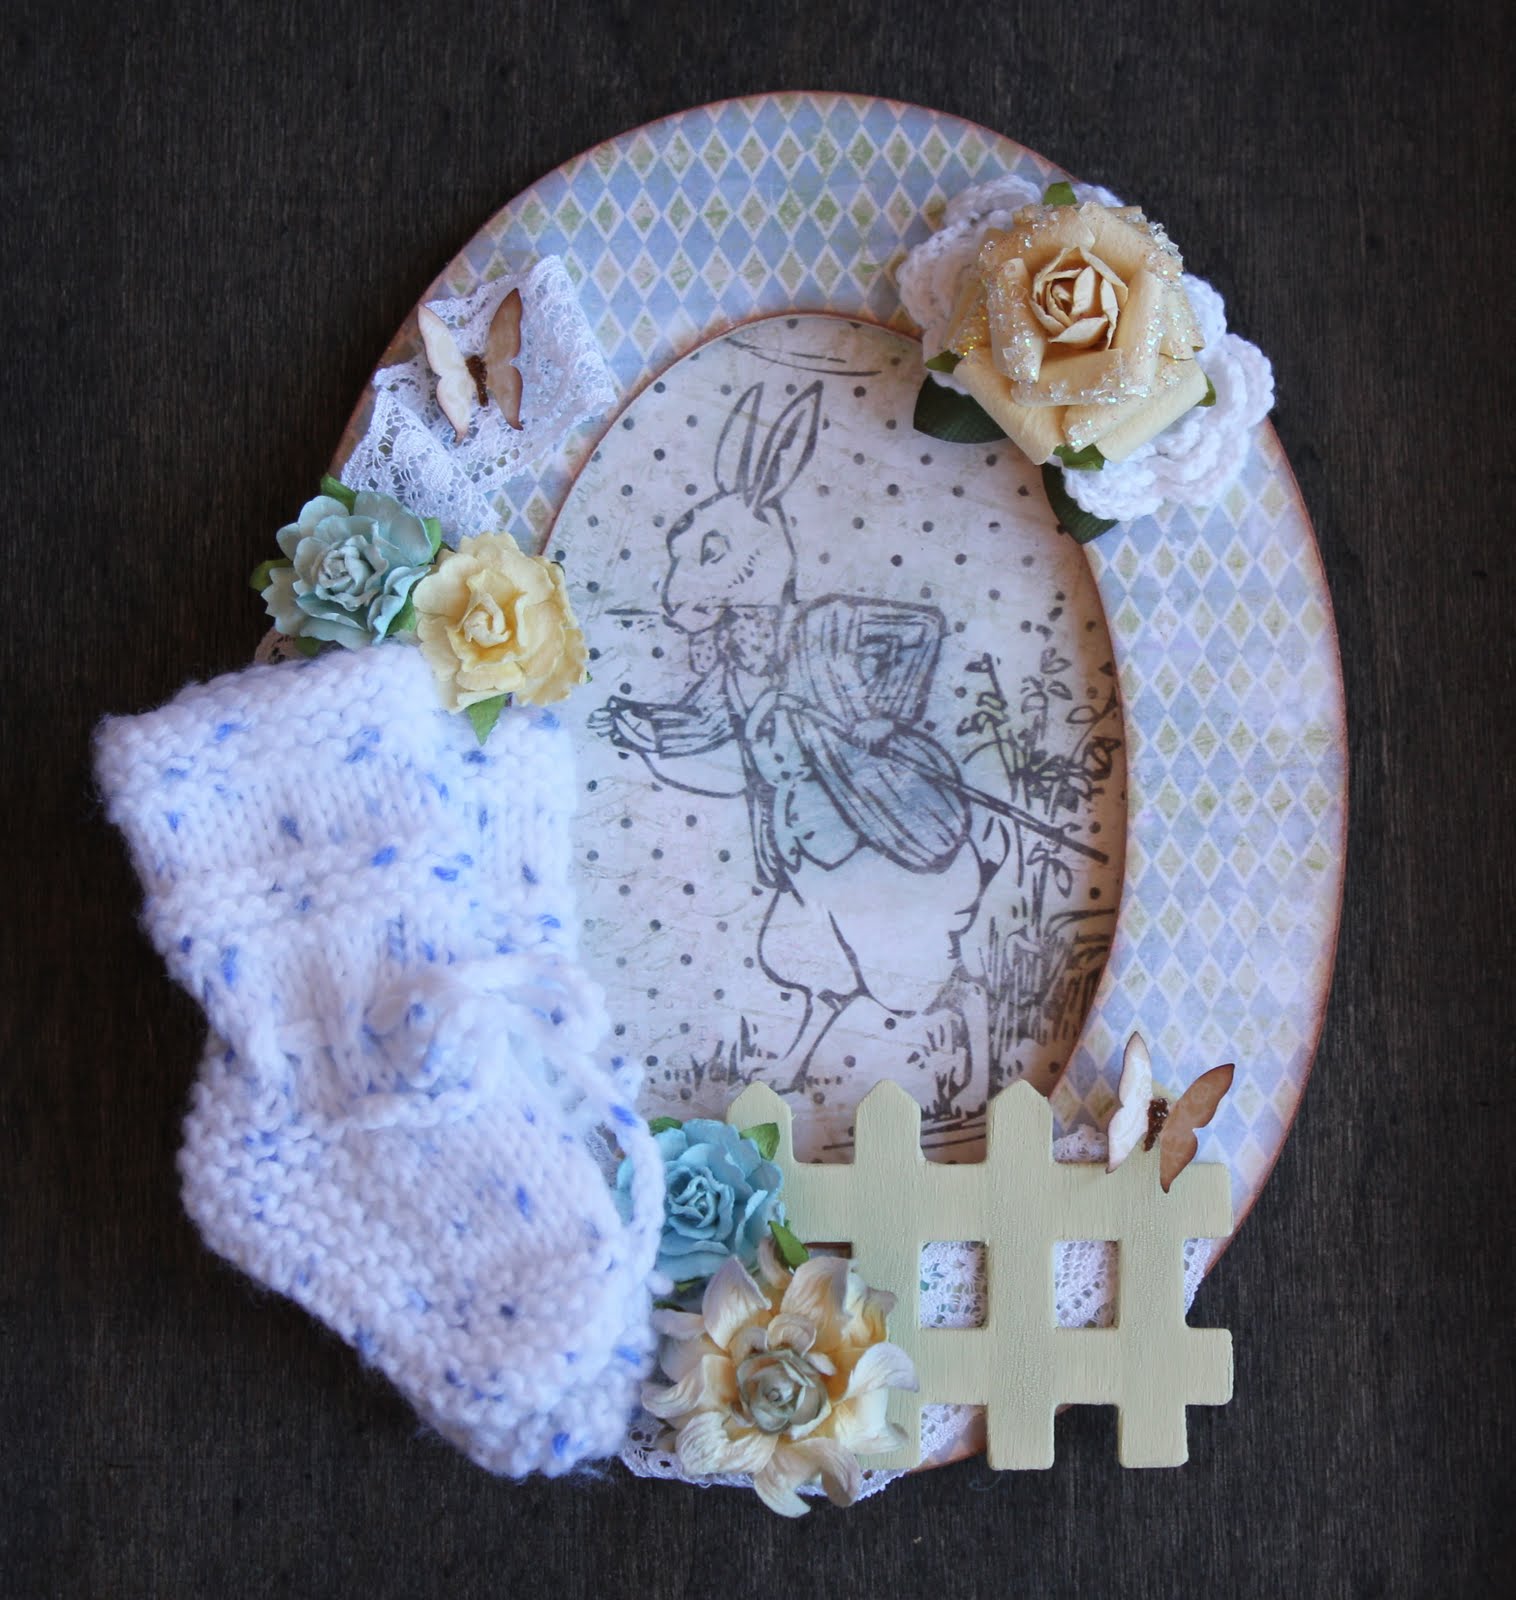
Design tip: Add mini roses to the middle of crochet flowers to dress them up.

As you can see this Scrap That! kit is so packed with gorgeous stuff so hurry fast before it is sold out! Thanks for stopping by and thank you for all the wonderful comments you leave, they are so appreciated.

Sunday, November 21, 2010

Scrap That! December Sneaks

Just a few more days until the Dec. kit reveal on the 26th... take a look at some of the gorgeous sneaks sent by all the DT!

Monday, November 8, 2010

Winter Roses Tutorial

Roses are my weakness - I admit it! I've been waiting to post this tutorial for a while because I needed my local Michael's Diamond Dust shipment to arrive. These flowers are so easy that you'll kick yourself for ever having paid full price for a pack. I figure each flower costs me under ten cents to make and they take very little time to do.


Here is what you will need: Two large punched flowers and three small (mine are 1 and 2 inches). All that matters is that there are 5 petals with separation and an inch difference between the large and small ones - so use whatever punch/dies you have. I used EK retro punches. You'll also need water to mist, clear glue or glitter glue, strong craft glue, Diamond Dust or chunky glitter, a thick rounded pen or paintbrush, a thin skewer or paintbrush and a foam pad/mouse pad. You can also punch a green pointed tip flower to act as your leaves later on.

Step 1: Water mist all the flowers and press the middles into the foam mat with the end of a wide rounded pen or paintbrush. Cup the small ones around the pen. Pinch one a bit and another a lot to form your bud.

Step 2: Using the skewer, tightly curl the petals of one large flower inwards and for the other do it outwards, as shown below. Doing it in opposition like this is what prevents flattening later on. Let all 5 flowers dry completely - this stiffens the paper to hold the shape.

Step 3: Glue the outwardly curled petals to the greenery and then the inwardly curled petals on top. Press all together into the foam mat with your pen to ensure glue stiffens in the "cup" shape - this is needed for your center.

Step 4: Glue the 3 small flowers into the middle, be generous with your glue as this will stiffen the flower and help with durability. Let the glue dry before moving on.

Step 5: Add a thin layer of clear glue or glitter glue where desired and then immediately press into Diamond Dust. Shake off excess. This will also stiffen the flower prevent damage.

That's it! Here is my finished rose.

Here is my rose beside a Prima brand "Marble Ice" one. You could always add a third layer to the bottom... but I like my flowers less bulky for layouts.

Thanks for stopping by. As always, your support means a lot to me so thank you for all the wonderful comments you leave - really makes my day to read them!

Wednesday, November 3, 2010

Vintage Style Flower Tutorial

Sorry it took me so long to get this tutorial up, but here it is!

I was inspired by Donna Salazar's layered flowers (hers are more grunge style with 4-5 layers of old maps and book pages) and wanted to create a soft delicate, vintage looking flower that was a little easier to manipulate with a whopping 10 layers of various materials. My finished size is 5 inches in diameter. I've seen a similar paper flower technique used with only cardstock on several blogs... but using different paper weights and sheer materials is what gives this flower the shabby vintage look.

What you need is 10 circles (whatever size you want the flower to be) of various materials that you can get a brad through all the 10 layers. Good choices are doilies, tulle, tissue paper, cardstock, mulberry paper, vellum, book pages, etc. You want the layers to vary slightly in size and be of different paper/material weights for amazing texture.

Here is what I used, two tulle circles roughly cut to 5 inches, three layers of thin mulberry paper (can use tissue paper) wet torn to 4 inches for a fuzzy edge, a small 4 inch doily, a few white cardstock circles cut with deco scissors and punched with MS lace border punch 4-5 inches, the inner circle of a larger doily 6 inches. I also inked the edges of the cardstock papers in brown, used bronze glimmer mist, water mist and a large brad.

Step 1: Mist the doilies and mulberry paper on one side and gently crumple. Glimmer mist the cardstock on both sides and crumple.

Step 2: Gently unravel (be careful with the thin papers) and layer onto brad alternating materials.

Step 3: Crumple each layer at a time towards the center, starting with the top layer. Let it dry a little.

Step 4: Before it completely dries, gently unravel the layers, starting with the bottom and place as desired to reveal all the gorgeous textures. You can leave the last layer closed if you prefer.

Here is my finished flower with the middle opened to reveal the brad. So fast and easy to do!

Experiment and have fun using different papers and materials too. Happy Scrapping! Your support means so much to me. Thank you for all the lovely comments everyone leaves for me.