With simply paper and creativity anyone can create art


Thursday, November 8, 2012

Tutorial: DIY paint or mistable fabric flowers

It's been a while since I've posted a new flower tutorial. I have had this one sitting in my head for a while... making your own fabric "mistable" flowers (like the Pink Paislee ones) that you can mist, paint, ink, use gelatos, etc. Best of all - NO SEWING REQUIRED!


Supplies needed: 
- 4 squares of fabric (I used old heavy cotton IKEA drapes but old tea towels work great too)
- a button (or a penny)
- small fabric covered elastic (white is best)
- mist, paint, ink or gelatos (I used a pink gelato by Faber-Castell and a peach mist)
- a water mister
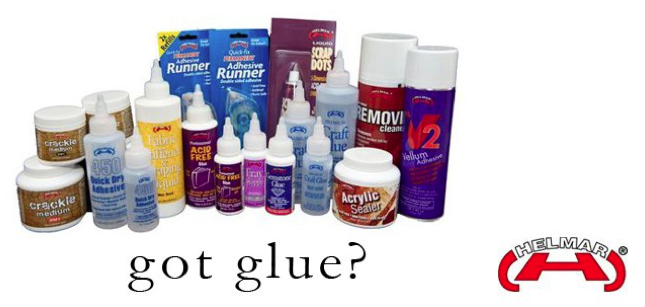
- strong, fast drying adhesive (I used Helmar's 450 quick dry)

Here is what the flower would look like if you don't paint/mist it (reminds me of the Pink Paislee mistable flowers).

Step 1: Hand-cut or use a die cutting machine to get 2 large, 1 medium and 1 smaller flower. Mine are about 5-inches for the large and 4-inch and 3-inch for the others. You can use this simple kirigami technique to hand-cut your flowers like I did.

Step 2: I created a paste by smearing a pink gelato into a plate and spritzing some peach mist into a plate.

Step 3: I dragged the flower edges in the paste, lightly misted the fabric with water to disperse the "paint" and crumpled the fabric to work the color in and make the edges shabby. I put less color on the 2 small ones (middle of flower). Let the petals dry now.

Step 4: I layered my dry flowers petals and put a thin dab of Helmar glue in the middle of each layer (off setting the petals) and adhered a button to the middle of the top layer.

Step 5: I gathered the layers and fastened the elastic to the bottom and put some 450 quick dry glue over it to keep it in place and let it dry.

Step 6: I flipped it over and ruffled into place.

Here are a few more I made with different fabrics by adding more water to my paste and creating a mist with my gelato mixture. Dryer sheets definitely soak up the mixture more than fabric does, and cream canvas and linen made it look much darker than white cotton.

Let me know what you think of these flowers!
Here is one of them on used on a layout...


Tuesday, November 6, 2012

Turn tags into cards (Helmar/Pion Design)

Last year I made these Pion Design paper tags as gift toppers for my two boys (aged 6 and 8 then) using the "Waiting for Santa 2" collection. Rather than throw them out after Christmas, I decided to save them and turn them into masculine cards for this year (for those times when you're in a hurry for a card :)  I used Helmar Premium Craft glue to adhere the tags to a beautiful piece of Core'dinations core-impressions cardstock (a Helmar preferred partner) and used their "Sand it Gadget" for a perfect fine grit sanding of the embossed clocks.


I covered the tag holes with brown bows and tucked plain white petal flowers to embellish a bit more.

On this one I tucked an extra flower petal layer in the corner too.

Check out the Helmar blog from now through November 10th for awesome creations from the design team using Core'dinations products!

Wednesday, October 31, 2012

More Swirlydoos Projects (using OUAS/2Crafty/Helmar)

HAPPY HALLOWEEN!
I have three more projects to reveal today that I created using my left-overs from my October Swirlydoos kit (since the blog hop reveal a few weeks ago). Up first is also a DT project reveal for the November Once Upon a Sketch (featuring some awesome 2Crafty chipboard and Helmar glue too).


This is my attempt at doing a negative space layout - difficult for me! I used the OUAS sketch upside down as shown below. The journaling on the back reads: "You are my sunshine, my only sunshine, you make me happy when skies are grey, you'll never know dear how much I love you, so please don't keep my sunshine away". My son adored this song as a baby - so I sang it to him every night. This is a picture of his first Halloween. Check out the November reveal for the OUAS challenge details and so many fantastic prizes to be won!

Here is a close-up of the pretty flowers in the kit and my reverse faux crackle finish on the Corine's Swirl (chipboard from my 2Crafty DT stash). To achieve the reverse faux crackle: I first stippled with gesso and once dry stippled on white acrylic paint. This created a nice bumpy surface. Once all dry I gently dipped my finger onto my chalk ink pad and gently rubbed the raised surfaces.

Here I simply put some diamond dust on the chipboard title I painted in white using some Helmar acid-free glue - to give it some texture and sparkle.

Here is a card I created for Sketch Inspiration - Swirlydoos is sponsoring them this week. Play along and you might win an October Swirlydoos kit!

Here is the sketch:

Last but not least a little matching tag to the card above.

NOTE: All of these projects were created with the special help of various Helmar Adhesives - especially my two favorites: the Premium Craft glue for paper and 450 Quick Dry for embellishments.


Sunday, October 28, 2012

A sneak...

I spent a full day teaching a Christmas advent calendar class yesterday and would like to thank the wonderful group of ladies who joined me for this workshop. Here is a peek at what we did. The full reveal of this project will be on Friday, November 23rd here and also on the Helmar blog.


Friday, October 26, 2012

Card in a pinch! (Pion Design/Helmar)

Pion Design papers makes it so easy to pull a quick card or tag together. There are so many beautiful images in all of their paper collections - like this one from the new "Silent Night" collection. I paired that paper with background ones from the "For Father" collection. That's what I love about Pion papers, the collections blend so seamlessly and are so versatile for any kind of paper crafting.


I used my one of my favorite Helmar glue on this  - the Premium craft glue. It is great for papers layers and embellishments. Don't forget to enter the Helmar Facebook contest to win some gooey goodness!

Wednesday, October 24, 2012

Helmar Facebook - win a PRIZE!

Helmar is giving away LOTS of glue!

FOR NEW FACEBOOK FANS: How about we offer a little incentive to join, a little gift of free prouduct to try for our future fans numbered 5200-5204. We'll let you know who you are when we get there! 


FOR EXISTING FACEBOOK FANS: For those of you who are already here I think we need a little challenge for you to complete. How about naming your favourite Helmar glue, why it is your favourite (short & sweet, we don't need a novel) and which Helmar Designer used it on the Helmarlive Ustream channel? Five random winners will be chosen!


Visit http://www.facebook.com/HelmarUSA to enter and... Good luck!


Saturday, October 20, 2012

Getting off the page - canvas purse (Helmar)

I am a scrapbooker by nature but once in a while I get a desire to create OTP projects. Here is a step-by-step on how I altered this canvas tote using my favorite Helmar adhesives and some fantastic preferred partner products. For Breast Cancer awareness month I went with PINK - my favorite color anyways :)

My mom gave me this 10x10 inch canvas purse she bought for $2 at a dollar store and said "Can you make something with this?".

So, I started to mist it (outside) and realized I was going through A LOT of mist without the result I wanted. It looked so "blah". Then, I remembered the awesome cross promotion products my Helmar DT received from Faber-Castell this summer. 

I started to play with a pink gelato and a green stamper's big brush pen. I made a pink paste in a plate with a gelato (scrape off a chunk of gelato and add a bit of water) and a green puddle with a big brush pen (scribble and mist some water) and painted them on with paintbrushes (pink paste and green puddle) for nice vibrant colors.

I then stamped with the green and used the brush pen directly on the stamped image to darken it. Next, I created a handmade flower (tutorial to follow soon) and glued it to the canvas using my all-time favorite Helmar product - the 450 quick dry. This stuff is better than any hot glue and won't yellow (or burn you). It's great for heavier items like this canvas flower or metal.

I also used thin gesso and a stencil for smeared writing and then added some water to my left-over gelato paste to create a mist. I misted the script stencil  for crisper pink letters. I next added some gorgeous lace from Green Tara using Helmar's Premium Craft glue. Works great on delicate fabrics - you can't see the glue and it won't yellow the lace.

Lastly, I gave this finished purse a spray of Helmar's Krystal Kote Matt to seal the colors in. It won't be washable so I wanted it a bit resistant to dirt. Because it is canvas I may even give it a water resistant spray too (like you would for canvas or suede shoes).

Tuesday, October 16, 2012

Merry and Bright (Meg's Garden/ 2Crafty/Helmar)

It feels a bit strange to be designing for Christmas before Halloween but I couldn't resist when I received the beautiful new "A Musical Christmas" collection from Meg's Garden. The glorious colors, the detailed graphics  - OH MY! I think I say it every time but these papers have such a beautiful hand stamped quality to them that you don't need to do much other than add fun embellishments.

This is a picture of my boys a few years ago posing in front the of the Christmas tree. The funny thing is that my own tree is decorated in a similar style as the graphics on this paper - dark red, white and gold (and a touch of pink). I instantly wanted to design with this particular paper. I actually used mini papers from the older "A Vintage Christmas" line for the photo mats since the collections blend so seamlessly.

I added some gorgeous 2Crafty chipboard (title and santa sleigh) and limited the flowers since it is a boy layout. Here is a close-up of the music notes on the paper behind the chipboard. On the chippies I dabbed texture paste to give it a snowy effect and then added some diamond dust (glitter glass would work wonders too). I actually clipped the third snowflake off the title and added to the top of the tree. For this one I simply used gold glitter glue on top of the clear diamond dust to give it extra sparkle.

Here is a close-up of the Santa sleigh that I primed with gesso, added texture paste and lightly inked the edges. Look at that beautiful hand stamped feel of the papers!!!

All of these projects were created with the special help of various Helmar Adhesives - especially my two favorites: the Premium Craft glue for paper and 450 Quick Dry for embellishments.

Before you go, don't forget to enter Meg's Blog Candy Giveaway at the end of the new DT announcement and good luck!

Monday, October 15, 2012

Meg's Garden DT announcement and PRIZE

I am happy to announce that I will be continuing on with Meg's Garden DT for another term. Please visit the official announcement here at;
http://megsgardenblog.blogspot.ca/2012/10/design-team-announcement_14.html#c to see all the lovely ladies who made the team as well as an EASY way to win a beautiful blog candy prize pack of gorgeous Meg's Garden papers and some fabulous embellies from her store!


Friday, October 12, 2012

Wedding Layout using Christmas papers (Pion/2Crafty/Helmar)

The Pion Design Silent Night collection is so versatile and can be used for so many kinds of projects. Here I am featuring a layout of my Mother and her Father on her wedding day. It was my parent's 40th year anniversary on September 30th and my Mother's 60th birthday is just around the corner on December 31st. Yup my dad has it very easy to remember... the last day of each month, LOL.

I have enhanced this layout with a lot of 2Crafty chipboard (elise dress form, parisian border and title).

I have simply used gesso and various brown inks to finish my chipboard - easy and economical!

Here is a close-up of the layered dress form chipboard - sooo love this piece!

I added a lot of pretty white flowers left over from various Swirlydoos kits.

The inspiration for this layout came from my friend Nadia Cannizzo - look at this gorgeous sketch of hers!

Please note: that all of these projects were created with the special help of various Helmar Adhesives - especially my two favorites: the Premium Craft glue for paper and chipboard, and 450 Quick Dry for embellishments/fabric. All Helmar products can be purchased directly at:
http://helmarusa.com or http://helmar.com.au (if you do not have a local shop that carries the products).


Monday, October 8, 2012

Swirlydoos October Kit Reveal Blog Hop

Welcome to Swirlydoos' October "Belle Chanson"
Kit Reveal and Blog Hop Block Party!

If you came here from Heidi's blog, then you are on the right track. If not, go back to Swirlydoos' blog and start from there. We have some amazing projects for you to see today and Teresa Collins is joining in the fun! Also, as an extra special twist, 2 of our designers are hiding secret prizes on their blogs! Make sure to leave a comment on ALL of the blogs for a chance to win. Check out Swirlydoos on Facebook and Like Us too!

Have I mentioned that Teresa Collins is featured in this kit? I really LOVE these vintage papers! This is a picture of my daughter as a newborn.

A close-up of the gorgeous Prima flowers in the flower add-on this month and some 2Crafty chipboard from my stash. I actually used a Christmas sketch as inspiration for this layout (that I've been holding onto for almost 2 years - created by a very talented artist - Charlotte Jenkins).

For this layout of my son, I pulled out my new Lucky 8 punch and created a bracket die cut by only punching 4 times on an 8x8 piece of paper and rounding off the un-punched edges.

Here is a close-up of more pretty Prima flowers in the add-on and some more 2Crafty chipboard from my stash. The chipboard was inked with the coordinating Prima chalk ink that is included in the main kit!

I used this month's Swirlydoos kit sketch created by our EXTREMELY talented sketch artist to create the layout above.

Lastly, a fun altered project for me to wear on Halloween this year. The mask was decorated with the trim and embellies from the MAIN KIT only. The Petaloo flowers were jewelled with the bling in the kit.

This is the Swirlydoos main kit, please see the website for all the great add-ons available.

***You have until midnight, eastern time, on Wednesday, 10/10 to complete the hop. Winners will be announced on the Swirlydoos Blog on Thursday 10/11.***

In order to qualify to win here is what you need to do:

1: Visit all of the blogs and leave a comment on each. This way we know you were there. Become a follower if you're not already. Take your time. There are REALLY beautiful things to see along the way.

2: Before you leave each blog, look for the “special” words and write it down. Once you have visited all the blogs and collected all the special words, they will create a sentence.

3: Finally, go back to the Swirlydoos blog and leave a comment letting us know how much fun you had, tell us the sentence that was created with all of the special words you collected. Can't wait to hear from you!

Interested in subscribing to Swirlydoos Kit Club? Click HERE. Don't for get to check out the Swirlydoos YouTube channel for great project techniques/tutorials and also our awesome forum with tons of great inspirational advice (no need to be a subscriber for this - it's free information for the taking and we'd love to chat with you!).

My special word is : ALONG

The party continues over at a new addition to the Swirlydoos Design Team -  Frank's blog. Have fun!

(Happy Canadian Thanksgiving to my fellow Canucks!)

Please note: that all of these projects were created with the special help of various Helmar Adhesives - especially my two favorites: the Premium Craft glue for paper and chipboard, and 450 Quick Dry for embellishments and fabric. BTW - check out this awesome article by Craft Test Dummies about ways to use Helmar's Remover cleaner to SAVE your crafting tools and money! All Helmar products can be purchased directly at:
http://helmarusa.com or http://helmar.com.au (if you do not have a local shop that carries the products).

Thursday, October 4, 2012

Swirlydoos Oct. kit sneaks

Come back here on Monday, Oct. 8th for the full design reveal :)


Wednesday, October 3, 2012

Contest Extended! Win Helmar PRIZES

YOU HAVE UNTIL SUNDAY OCT. 7th TO PARTICIPATE...
Go to the Helmar FACEBOOK page and LIKE them, plus tell them what you like best about WINTER to be eligible for a prize!  But... you must tell them that I, Vicky Alberto sent you there to like them so that I qualify for a prize too :) If you already like them, then still leave a comment to be entered to win anyways. Easy peasy! Winner gets some gluey goodness.

DON'T FORGET TO ENTER HELMAR'S OCTOBER COLOR PALETTE CHALLENGE THIS MONTH TOO,  DETAILS ON THE HELMAR BLOG.


BTW - What do I like about Winter? I love Christmas, coffee and Baileys, scrapbooking by the fireplace, watching my kids have fun in the snow and escaping to the mountains for a weekend getaway. Other than those 5 things - I HATE WINTER!!!

Monday, October 1, 2012

October OUAS Reveal (using Pion Design)

Can you believe it is already October? I can't. Today I am revealing my Once Upon a Sketch DT layout, featuring Pion Design papers (mix of For Mother and For Father collections). The OUAS challenge theme this month and my project revolves around interpreting this quote...

"Life is like a camera, just focus on what's important and capture the good times, develop from the negatives and if things don't work out, just take another shot". This is a very fitting quote for very personal reasons and I have word for word journaled it on the back of my layout. Pictured is my mother holding my youngest baby at the age of 8 months. Please click on images for a larger view.


Here is a close-up of the pretty Pion papers, Dusty attic chipboard and an assortment of flowers. BTW - I re-stocked my Etsy shop yesterday with Dusty Attic and 2Crafty chipboard - see the previous blog post :)

This is the gorgeous sketch and challenge details. Please note that my layout was glued using a variety of awesome Helmar adhesives.

I hope you can play along with the October challenge!