With simply paper and creativity anyone can create art


Monday, February 11, 2013

Swirlydoos February Blog Hop


Welcome to Swirlydoos' "Upon a Time" Kit Reveal
Blog Hop Block Party!
If you came here from Rae's blog, then you are on the right track. If not, go back to Swirlydoos' blog and start from there. We have some amazing projects for you to see today. Make sure to leave a comment on all of the blogs for a chance to win a prize! Check out Swirlydoos on Facebook and Like Us too!

Well, this kit featuring the entire Graphic 45 "A Place in Time" collection (26 sheets of paper!) really gives paper crafters endless possibilities to create with. Oh there are so many color combinations to choose from! Here is a layout of my daughter as a baby. I have added some Dusty Attic chipboard (lacing tash and mini word title) from my stash to complement my kit layout. Click images for larger views.

Here is a close-up of the gorgeous pearl bling and fabric flowers this month!

I also used the beautiful kit sketch as inspiration for the layout above.

Next is a a layout of my son as a fun little toddler. Once again, I added some DA chipboard from my stash to complement the kit (snowflakes and scroll border).

Here is a close-up of the pretty blue kit flowers and my handmade ones too. I am working on a tutorial for these and will post it soon.

I used the Dusty Attic February sketch as inspiration for the layout above.

Lastly for today, I made a birthday gift box. Like I said, this kit has so many possibilities. I really love the variety of embellishments this month - so fun to work with!

I used this template to create my gift bag with a "unit" of 1.75 inches. Click image for larger view.
You have until midnight, eastern time, on Thursday, FEB. 14 to complete the hop. Winners will be announced on the Swirlydoos Blog on Friday 1/25. In order to qualify to win here is what you need to do:

1: Visit all of the blogs and leave a comment on each. This way we know you were there. Become a follower if you're not already. Take your time. There are REALLY beautiful things to see along the way.

2: Before you leave each blog, look for the “special” words and write it down.
Once you have visited all the blogs and collected all the special words, they will create a sentence.

3: Finally, go back to the Swirlydoos blog and leave a comment letting us know how much fun you had, tell us the sentence that was created with all of the special words you collected. Can't wait to hear from you.

My special word is : DIET

I will be back in a week or so with more kit projects too! Here is a peek at the "Upon a Time" main kit. To become a subscriber and never miss a gorgeous Swirlydoos kit click here.
The party continues over at Angelica's blog. Have fun!

NOTE: I used a lot of Helmar goodness to stick all of my projects together. I used the premium craft glue on the paper layers, the 450 quick dry on the flowers, the adhesive runner for the photos, Zapdots to add dimension, and the acid-free glue for all the chipboard pieces. Thank goodness for good glue!


Thursday, January 31, 2013

Lots of Swirlydoos, Dusty Attic and Helmar!


How can you go wrong when you combine a beautiful Swirlydoos kit, with gorgeous Dusty Attic products, and stick it all down with Helmar adhesives? NOTE: I have provided a handy list of the various Helmar products I use for different tasks on these projects at the end of this post.


I have created 3 more projects with my Swirlydoos January "Whimsy" kit" which features a lot of Prima goodness. I rarely do multi-pics but this one was fitting of my daughter as a toddler. The flowers in the add-on kit were a perfect compliment to these papers. Click on images for larger views.


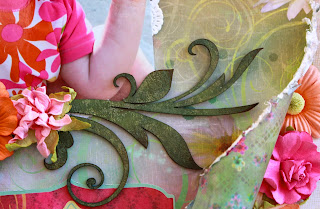
I cut up the Dusty Attic leafy flourish to put on either side of my flower cluster. I simply painted it with several Dusty in Colour green paints and then topped with a variety of green and brown Clearsnap chalk ink.

Thank you Clearsnap for sending the Helmar team such awesome products to work with! This is what they sent me (my choice!) - the Autumn chalk ink set... LOVE IT! Clearsnap chalk inks have always been a must-have in my scrappy stash.

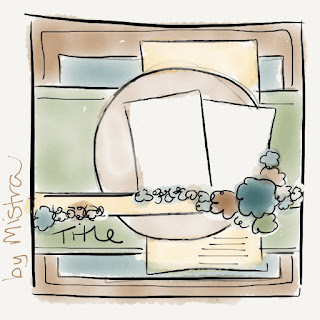
Here is the Prima January BAP sketch that I used as an inspiration starting point.

I thought it would be fitting to do a layout about achieving creative dreams. I have had the pleasure of designing for such fantastic companies. OK, I will be honest that purple is a very challenging color for me to scrap - but these Fabscraps papers in the January kit were just so beautiful with a hint of blue. I did some inking (using Clearsnap chalk ink) around all of the edges and layered some doilies.

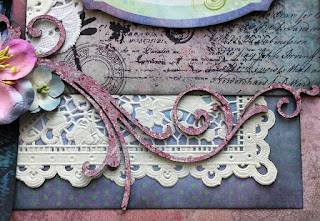
I have used the DA decorative scroll #1 and cut it into several pieces. I painted it with several gorgeous colours from the brand new "Dusty in Colour" release of acrylic paints. I simply splattered it all to give it an artsy feel.

Next I used some chipboard mini words for the title (again swiping here and there with Dusty paints) and then added a pretty butterfly from the newly released chipboard styles. I also added a few small "Dusty in Bloom" flowers to the gorgeous main kit flowers - a perfect match!

FAUX REVERSE CRACKLE (technique on the butterfly)
Step 1 - Generously stipple gesso onto chipboard and let dry (the paint "peaks" will settle a bit).
Step 2 - Let completely dry.
Step 3 - Dip your finger into chalk ink and gently rub over the textured bumps to highlight them

This layout was inspired by the fantastic Dusty Attic January sketch (I reversed it). Don't forget to enter each month for a chance to win some beautiful products!

Lastly I have created an origami purse (gift bag). The decorative handle is actually a part of a broken fairy Halloween costume that I "borrowed/recycled" from my daughter's closet.

Here is a close-up of the Swirlydoos main kit flowers surrounded by Dusty Attic leaves and a cute little DA butterfly too. I used the Silks paint in the kit and topped the butterfly with Diamond Dust glitter glass.

Here is a quick snap before assembling the purse. I used a traditional gift bag folding technique to get it to this point and then slightly modified it to create the purse flap. Here is a great YouTube video on how to do a regular gift bag.

Helmar products used in these projects:
Premium Craft Glue - for paper layers
450 quick dry - for flowers
Acid-free - for chipboard and to adhere glitter
Adhesive Runner - for photos
Zapdots - for raising titles/notecards and clasping the purse
Gemstone glue - for pearls and gems

Don't forget to check out the awesome projects on the blogs for the cross promotion between Helmar and Clearsnap!


Monday, January 28, 2013

A little ATC (Meg's Garden/Dusty Attic/Helmar)

Artist trading cards (ATCs) are the perfect little canvas (2.5" x 3.5") to play with product and create a pretty embellishment to add to a layout or as a focal point of a card or tag.


Here I have used an older paper from Meg's Garden "The Antoinette Collection" to create a Parisian themed card. The papers in the additional strip you receive with Meg's papers are perfect for these kinds of little projects. I have added a beautiful Dusty Attic chipboard fountain (painted in DA white paint) that I topped with a mix of pale pink fine german glitter glass (also from Meg's shop) combined with coarser glass Diamond Dust. I love the effect of combining the two glass products for a soft effect. I used a nice variety of Helmar adhesives - premium craft glue for the paper layers, acid-free glue to adhere the glass to the fountain as well as stick the fountain to the paper, 450 quick dry for the flowers and butterflies, plus gemstone glue for the pearls in the flower centres. Amazing how much glue a little ATC can take!

Tuesday, January 22, 2013

Swirlydoos January Blog Hop

Welcome to Swirlydoos' January "Whimsy" Kit Reveal
Blog Hop Block Party!
If you came here from Paulien's blog, then you are on the right track. If not, go back to Swirlydoos' blog and start from there. We have some amazing projects for you to see today. Make sure to leave a comment on all of the blogs for a chance to win! Check out Swirlydoos on Facebook and Like Us too!

Today is finally time to share a few projects made with my January Swirlydoos kit - a pretty mix of Prima, Fabscraps and Kaisercraft papers this month. I just love this first picture of my boys with a friend... taken while climbing trees by a splash park in the city. It was a picture perfect moment captured. I added some brand new Dusty Attic chipboard from my stash (french garden border) and painted it with some of their new paints too.

Click on images to see larger views.

The flower add-on has these beautiful Kaiser blooms. I cut out some of the blue butterflies from another paper and layered them onto the ones printed in yellow on the paper.

Here is a layout inspired from the kit sketch this month. I adore this picture of my boys as toddlers - they really are good friends - so sweet. More pretty blooms and resin from the kit.

This is the beautiful Swirlydoos sketch for January.

I added some Dusty Attic chipboard from my stash (corner vine). I simply inked it brown in a random pattern as to not over saturate it all and it gave a nice effect. The white flower is handmade.

On this one (Morrocan lamp) I added some teal Silks paint from a previous Swirlydoos kit. I love how Krissy has been including one of these paints in each Swirlydoos kit for the past few months!

Working with the Prima papers, I altered a Dusty Attic Journal and added a chipboard garden fairy from my stash. I just love the blooms this month that perfectly match all the different paper colors.

I wanted to show a great way to use the beautiful Silks paint in the January kit so I painted the chipboard with off-white acrylic paint, glazed the tips with the pink Silks paint and flared the color to gradually get darker on the ends. Here is a close-up in direct sunlight to show the dimension that adding glass diamond dust creates for the hair/wings and dress while keeping the paint color the same.


You have until midnight, eastern time, on Thursday, 1/24 to complete the hop. Winners will be announced on the Swirlydoos Blog on Friday 1/25. In order to qualify to win here is what you need to do:


1: Visit all of the blogs and leave a comment on each. This way we know you were there. Become a follower if you're not already. Take your time. There are REALLY beautiful things to see along the way.


2: Before you leave each blog, look for the “special” words and write it down.
Once you have visited all the blogs and collected all the special words, they will create a sentence.

3: Finally, go back to the Swirlydoos blog and leave a comment letting us know how much fun you had, tell us the sentence that was created with all of the special words you collected. Can't wait to hear from you.


My special word is : REMEMBER

I will be back in a few days with more kit projects too! Here is a peek at the main kit and I have a lot of pinks and purples still to play with :) To become a subscriber and never miss a gorgeous Swirlydoos kit click here.


The party continues over at Irene's blog. Have fun!

NOTE: I used a lot of Helmar goodness to stick all of my projects together. I used the premium craft glue on the paper layers, the 450 quick dry on the flowers and leaves, the adhesive runner for the photos, Zapdots to raise the title, and the acid-free glue for all the chipboard pieces. Thank goodness for good glue!

Tuesday, January 15, 2013

Birdcage Tag Tutorial (Swirlydoos/Helmar)

Here is the first challenge in our six week Ultimate Design Challenge at Swirlydoos! The first challenge is issued by me, yippee!!!

"To create a multi-dimensional embellishment for use on a scrapbook page, card or other altered item"

• You must use either a die cut paper or a piece of chipboard as your base shape (does not have to be a birdcage)

• You must turn that die cut/chipboard into a dimensional (layered) usable embellishment

• You must use at least TWO art mediums (gesso, gels, pastes, glazes, paints etc.)

• Your final piece must be showcased on a layout, card or other altered item

• Post a photo of the embellishment ONLY on this thread, and upload the finished project into the Swirlydoos gallery by the deadline

This project is due by Midnight MST on Saturday, January 19th. Your completed project must be uploaded into the "Ultimate Design Challenge - WEEK 1" gallery within the Swirlydoos gallery.

You may follow along and create something along these lines of my birdcage tutorial below, or feel free use your own creative license to show us what amazing concepts you have hiding within yourself!

Here is a birdcage tag/embellishment example that I created for the Swirlydoos Challenge.

Materials you will need:
- 2 white cardstock or light colored birdcage cutouts (any die) or 1 chipboard piece
- 1 bird die cut or chipboard
- patterned paper (color of your choice)
- flowers (color of your choice)
- feathers (color of your choice)
- paint or glaze (color of your choice)
- script or pattern stamp and ink
- ribbon (color of your choice)
*bling and lace are optional (not show in image below)
* you will need to prime with gesso if using chipboard instead of cardstock
*glue (I used Helmar acid-free adhesive and 450 quick-dry)
*craft knife or scissors will also be required

Step 1: Stamp your 2 cardstock birdcages and paint your bird. You will only need 1 cage if using chipboard.

Step 2: Adhere the birdcage to your patterned paper and cut excess off. Be sure not to cover the top hole so that you can pull some ribbon through.

Step 3: Adhere the other birdcage to the backside if using cardstock - skip this step if using chipboard. This gives the cardstock extra thickness and support.

Step 4: Add the bird, feathers and flowers.

Step 5 (optional): Add the ribbon, lace and bling.

Now it is time to add your tag to a project. Here I added mine to a layout created with the Swirlydoos November 2012 kit. I also created the large handmade flower on this layout using my DIY "mistable" flower tutorial.

Tuesday, January 8, 2013

New Meg's Garden Collection

Check out the brand new "Ode to a Summer's Day" collection by Meg's Garden. Larger view on her blog and introductory pricing special too.


Thursday, January 3, 2013

A few cards (Helmar/Meg's Garden)

I'm not typically a card maker but lately they are sneaking their way into my life. First up is a card I made to MYSELF, using the January Helmar Challenge as inspiration. I used a beautiful paper from Meg's Garden "The Spring Paisley" collection and I attached a transparency butterfly (also from Meg's Garden) with clear Helmar Zapdots. The pretty flowers were glued on with Helmar 450 quick dry.


This is the challenge for this month and I chose a peachy orange and teal blue. My list is actually inside the card and with an extremely personal top 5 things I need to work on. I plan to keep this card sitting on my home desk to remind me each day of the important life goals I have set for myself.  Don't forget to check out the Helmar Challenge details and enter to win some gluey goodness!

Next, is a card I made using Pion Design's "Play Time" collection. I gave this card to my parents for Christmas. It contains a special message on the tag and vouchers for a romantic sunset hot air balloon ride with champagne. This is probably the coolest Christmas present I have ever given them. I had to take a quick snap of it on Christmas Eve before giving it away and it was terribly gloomy by the end of the day.

I used Helmar's premium craft glue on the paper layers and the 450 quick dry on the flowers.


Wednesday, January 2, 2013

Swirlydoos Ultimate Design Challenge

Would you love the chance to win a HUGE prize (valued at over $400) and a chance to design for the Swirlydoos Kit Club? See details and contest rules and prize close-ups at swirlydoos.com. Don't forget to register BEFORE January 10th!

(click on image to see larger)


Tuesday, January 1, 2013

Dusty Attic Design Team

Well... it certainly is a very nice start to a HAPPY NEW YEAR!  I can share some good news... I've been invited to join the new 2013 Dusty Attic design team.


If you missed the announcement, here is a list of the entire team for the next year (taken from the Dusty Attic Blog), and my name was just added yesterday :) It's going to be a really wonderful year "working" with these ladies...


Monday, December 31, 2012

Farewell to Pion Design and 2Crafty (using OUAS sketch + Helmar adhesives)

Today is reveal day for the Once Upon a Sketch January challenge. Today is also my final post as a design team member for two wonderful scrapbook companies, Pion Design (paper) and 2Crafty (chipboard). I would like to thank Pion Design for having me on their fantastic design team for two entire years as well as 2Crafty for the past few months. From the bottom of my heart, thank you so much Jenny and Vanessa from for your generosity and flexibility when my schedule was hectic. I hope our paths will cross again in the future. Here is a layout using the newest Pion collection "Play Time" and some very pretty 2Crafty chippies. I used gesso and chalk ink on the chipboard pieces.

(click image to see larger)
Journaling on the back reads:
I have a wonderful life but am looking to you to point me in the right direction to find my inner child this year and make time for more fun... to create more wonderful memories, love Mom, xoxo (January 2013).

The OUAS theme this month is "the start of something new" and for me that is trying something new... looking at life through my children's eyes. I am an only child and have always been the mature one, the responsible one, blah, blah, etc. I feel like I am missing out on something - more fun. As much as I ADORE scrapping, it is very time consuming and getting in the way a bit of my family fun time... so I need to cut back just a little bit.

Here is the OUAS sketch this month. I used this as a starting point but my layout seemed to take on a life of it's own, LOL.

This project was made using a lot of Helmar goodness. I used the premium craft glue on the paper layers, the 450 quick dry on the flowers, the adhesive runner for the photo and the acid-free glue for the chipboard.


Friday, December 28, 2012

Christmas Layout Tutorial (with Swirlydoos and Helmar)

ANATOMY OF A LAYOUT
Today I am sharing how I made my "Joy to the world" layout (using my Swirlydoos December "Believe" kit) featuring the Kaisercraft "Turtle Dove" collection. I wanted my layout to look like an elegant Christmas ball and used tons of Helmar goodness to stick it together!

STEP 1 - BACKGROUND PAPER
Select a background paper and cut out a portion of the centre. I like to either cut a square or circle to be used for another project. Make sure to leave at least a 2-inch border around the edges though.

STEP 2 - ADD A PAPER LAYER
Select a top layer paper and roughly cut a wavy border around the edge - removing only 1/4 inch or so around and then ink all of the edges with brown Clearsnap chalk ink. Glue it to your background using Helmar Premium craft glue, placing the glue only around the cut-out edge.

STEP 3 - ADD THE TRIM AND PHOTO
Cut your photo into a circle shape and glue it down the Helmar's adhesive runner. Next, add the zipper with Helmar 450 quick dry along the metal and trim off excess. Lastly, glue some trim around the edge of the photo starting at the top. Don't worry the flowers will hide the gap if you are short a little trim.

STEP 4 - ADD A FLOWER CLUSTER AND LEAVES
Use 5 flowers (2 large and 3 small - I used a Petaloo pack) for the cluster and add a berry centre. Add the Petaloo leaves around the cluster but save 1 for later. Cut off and save the 2 leaves around the berries for later.

STEP 5 - ADD THE TEARS
Tear the paper in several spots and ink the revealed white core of the paper with brown Clearsnap chalk ink.

STEP 6 - ADD FLOWERS TO THE CORNERS
Polish the layout off by adding the last 3 Petaloo flowers to the corners. In the bottom corner, place the 2 saved leaves from the berry spring under them. In the top corner,  place a Petaloo leaf under the flower.

That's it! The paper comes with a beautiful "Joy to the world" title already scripted on it.