With simply paper and creativity anyone can create art


Tuesday, March 19, 2013

Inspire Card (Meg's Garden/ Dusty Attic/ Helmar)

The extra strip of paper you receive with each of Meg's Garden papers are the perfect size to be folded in half to a perfect card size. I used the French Bird Cage sheet of paper from the Le Belle Jardin collection. This beautiful floral paper is so delightful and easy to work with. Meg also carries a beautiful selection of lace and flowers in the shop to embellish your projects. In addition, I have added some beautiful Dusty Attic chipboard pieces from my scrap stash and a handmade pink rose to compliment my card.

Click on images to see larger views.

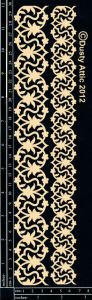
I used the Dusty Attic mini word inspire, a left over piece from the French garden border casing and a butterfly from the newest January 2013 release. I primed the chipboard with gesso and used texture effects paste on the title and border and then glass bead gel and ink on the butterfly.

I also added a large handmade rose (tutorial to follow soon) and surrounded it with a few Dusty attic flowers.

NOTE: I used Helmar adhesives for this project: The Premium Craft glue for the lace, Acid-Free glue for the chipboard and handmade flower as well as 450 Quick Dry glue to adhere all the flowers to the card.

Monday, March 18, 2013

TUTORIAL: Anatomy of a layout (Swirlydoos/ Helmar)

Here is a breakdown of how I created a layout about my husband and I, using the Prima Engraver papers (in my March Swirlydoos "Vintage Chic" kit) and tons of Helmar goodness. I posted this on the Swirlydoos Forum and the Helmar blog but thought I would archive it here on my blog too.

STEP 1: BACKGROUND LAYERS
I cut one inch off the top and the left side of the black paper - leaving me with an 11-inch square (without cutting off the pretty flower print). I distressed it with my electronic Zutter Distrezz-it-all tool. Then, I cut a 3.5-inch wide by 10-inch tall piece of the script paper and distressed that too and glued it down as shown with the Premium Craft glue. NOTE: I never glue all my edges down so that I can add texture, tears or curl the paper edges later on.
click on images for larger views

STEP 2: CREATING A PATTERNED LAYER
Next, I took a Prima stencil and stippled gesso onto the middle of the tan paper (where there was no pattern printed). Then, I cut an 8-inch by 8-inch piece out to use as another layer. TIP: If you choose to use a light colored photo, then black gesso might look better. Since my photo choice was dark, the white makes it stand out better to create the focal point of the page.

STEP 3: FRAMING THE PHOTO
After adding my gesso patterned paper, (without glueing down the bottom third of this paper), I chose to fussy cut a clock out of one of the other Prima papers and add the Prima flower packaging to frame my photo (photo is standard 4x6 inch size). On the clock, I cut apart some Prima bling strips to accent above the numbers. The papers were glued down using Helmar's Premium craft glue and the photo was added using the Adhesive Runner.

STEP 4: ADDING THE FINISHING TOUCHES
To polish things off, I added some Prima bling strips under the photo and tore the gessoed paper up to the bling. I then tucked a scrap of the scrip paper under it the tear. I curled the tear, as well as all 4 of the black paper corners and the top right of the gessoed paper too. Lastly, I took off the bottom layer of one of the Prima flowers and tucked the petals into the top right curl before adding the two large flowers to the corner of my photo. The flowers were added using Helmar 450 quick dry.
That's it, layout complete!


Monday, March 11, 2013

Swirlydoos March Blog Hop

Welcome to Swirlydoos' March Kit Reveal
and Blog Hop Block Party!

If you came here from Heidi's blog, then you are on the right track. If not, go back to the Swirlydoos blog and start from there. We have some amazing projects for you to see today and a special guest designer too - Manda (she won layout of the year 2012 at Swirlydoos!). Make sure to leave a comment on all of the blogs for a chance to win prizes for participation in this hop. also, be sure to check out Swirlydoos on Facebook and Like Us too!

Swirlydoos has a DT call for Educators!
As you know we have a kick-butt Education team and we are looking to add to our family. If you love to create tutorials and share your love of the craft with others, we would love to have you on our team. The deadline is looming! Please click on THIS LINK to learn more!

Now on to the March "Vintage Chic" kit...
This beautiful kit features a lot of Prima goodness from the "Engraver" collection, so I thought it fitting to use the March Prima BAP sketch for a layout. I have been itching to scrap this recent school picture of my daughter in her favourite dress.

Click on images to see larger views.

The main kit and flower add-on features gorgeous flowers! For the title, I simply used pastel chalk on the word laughter in the paper. Suits my daugher perfectly - she is always full of laughter.

Here is a layout of my husband and I that I created ENTIRELY with the main "Vintage Chic" kit contents only. I just used a few tools and gesso from my stash - nothing else. You can find a step-by-step tutorial on the Swirlydoos forum HERE on how to create this layout.

Awesome flowers and fun bling in the main kit!

Here, I simply altered a plain kraft bag and added a handmade flower. I have lots of flower tutorials in the right sidebar of this blog.

I cut apart one of the bling strips to add to the clock.

You have until midnight, eastern time, on Wednesday 3/13 to complete the hop. Winners will be announced on the Swirlydoos Blog on Thursday 3/14. In order to qualify to win here is what you need to do:

1: Visit all of the blogs and leave a comment on each. This way we know you were there. Become a follower if you're not already. Take your time. There are REALLY beautiful things to see along the way.


2: Before you leave each blog, look for the “special” words and write it down. 
Once you have visited all the blogs and collected all the special words, they will create a sentence. 

3: Finally, go back to the Swirlydoos blog and leave a comment letting us know how much fun you had, tell us the sentence that was created with all of the special words you collected. Can't wait to hear from you.


Lastly, here is a look at the Swirlydoos main kit. To become a subscriber and never miss a gorgeous Swirlydoos kit click here.


My special words are: all be
The party continues over at Miranda's blog. Have fun!

NOTE: I used a lot of Helmar goodness to stick all of my projects together. I used the premium craft glue on the paper layers, the 450 quick dry on the flowers, the adhesive runner for the photos and Zapdots to add dimension.


Thursday, February 28, 2013

March OUAS Reveal (Meg's Garden/ Dusty Attic/ Helmar)

Can you believe it's already March? That means another Once Upon a Sketch reveal and I have used some gorgeous Meg's Garden papers from the new "Ode to a Summer's Day" collection, plus the brand new Dusty Attic chipboard floral corners. All that combined with a doily and a few Green Tara flowers for a shabbylicious finish. These papers have such a beautiful pattern on them that you don't need to do much to achieve a polished layout. I glued everything down using a variety of Helmar adhesives (details at the end of this post).

Click on images for larger views.

The OUAS theme this month is "What does your weekend look like?". For me... when I am not scrapping, I am outdoors with my children. Since the papers are girlie, I decided to focus on my daughter for this layout. The journaling on the back of my layout reads:
"Simple moments playing outside with you is one of the greatest joys of my weekend"

Here is a peek at the OUAS challenge. I hope you can play along this month! Check out the amazing DT reveal this month and the terrific prizes up for grabs! 


Here is a close-up of the DA chipboard. I primed it with gesso and then used Faber-Castell gelatos to achieve a shabby waxy crayon look. Without priming, gelatos offer full coverage - a lot like what inking or painting looks like. I wanted a bit of the white resist look that gesso provides. I also used gelatos (mixed with water) to paint the white flower centers yellow.

This project was made using a lot of Helmar goodness. I used the premium craft glue on the paper layers, the 450 quick dry on the flowers, the adhesive runner for the photo and the acid-free glue for the chipboard.


Sunday, February 24, 2013

A few last February shares (Swirlydoos, Dusty Attic, Helmar)

In celebration of LOVE month I have made a few projects using my February Swirlydoos "Upon a Time" kit, which features the fantastic "Place in Time" collection (you get ALL of the 26 papers from the collection in the main kit!).  I added some beautiful Dusty Attic chipboard from my stash to my projects and lots of Hemar goodness to stick it all together.

I have decorated a handmade 4-inch kirigami box folded from the G45 paper in my kit (a tutorial can be found on my blog for the folded kirigami box). I have used Helmar Premium craft glue for the paper layers and acid free glue to adhere the chipboard.

Here is a view of the two portions of the box before assembling. I added some DA chipboard pieces from the lacing tash around the sides of the lid of the box and then created some faux ceramic tiles for the "you" word (a tutorial is below in the next post on how to create these letter tiles). The lacing tash was simply painted with DA Cranberry paint. . 

I also created an ATC with a project in mind this month. I wanted to adhere it to a cinnamon heart filled jar (a recycled Kraft jam jar was the perfect size). I decorated my ATC with a Dusty Attic French Flourish, painted it with black Soot DA paint and then coated it with DA Clear Crackle Varnish. I then added a cute little cupid and title. I simply glued the ATC to my jar for a perfect fit!

Here is a close-up of the ATC and the crackle finish. I just adored this G45 paper in the Swirlydoos kit. I used Helmar Premium craft glue for the layers and Dusty Attic chipboard and then adhered everything to the jar using my favourite glue - the Helmar 450 quick dry. This stuff is so strong I even fixed my mop with it!

This project was inspired by the beautiful Feb. Helmar sketch challenge this month. Be sure to link your project in the Helmar blog sidebar for a chance to win some gluey goodness!

Lastly, here is a look at the Swirlydoos main kit. To become a subscriber and never miss a gorgeous Swirlydoos kit click here.

Saturday, February 23, 2013

TUTORIAL: Faux Ceramic Letter Tiles

Here is a very easy tutorial on how to create faux ceramic tile letters out of chipboard squares and sticker letters.

I took 3 (of the 6) Dusty Attic French Window Pane chipboard squares (the portion that some people discard to reveal the window).

I painted the squares with Dusty Attic black Soot paint.

I adhered a letter sticker to each of the painted tiles.

I coated each tile with Dusty Attic Clear Gloss Varnish to create a ceramic tile appearance. This varnish product goes on so smoothly and dries very quickly too.

Then, simply glue the tiles to any project - so easy!


Thursday, February 21, 2013

TUTORIAL - Versatile flowers

I have used these handmade flowers on several projects so I thought it would be time to provide a little tutorial. In changing the middle to coordinate with your project, the possibilities are endless on the "looks" you can create with this simple flower base.

STEP 1 - To start, you will need two punched or die-cut flowers with 5 or 6 wide petals. Mine are 2.5 inch punched from my EK Success Daisy punch.


STEP 2 - Mist the flowers (with water or a paint mist if preferred) and curl each petal and pinch while curled around the object to create wrinkles. Note - this will not work if not wet enough.


STEP 3 - Once your curled and pinched petals are almost dry, use a rounded stylus (or end of a paintbrush) and press the middle of each flower into a foam mat. This will raise the petals. now, let completely dry in this shape.


STEP 4 - While off-setting the petals, glue the centers of the dried layers together, pressing into the mat again with the stylus. I used Helmar 450 quick dry glue. Pinch the petal ends to shape them a little more. 


STEP 5 - Now it is time to add a center of your choice. Below, I simply glued a coordinating flower into the middle.


On another project, I used Helmar gemtone glue to add loose pearls and used Clearsnap chalk ink on the petal ends for an antique look. I also pinched the ends a little more to simulate a poinsettia.

Depending on the punched or die cut flower style, the paints and inks used as well as the choice to decorate the middle - the variations you can create are endless!


Monday, February 18, 2013

New DA chipboard in my shop!

I re-stocked my Etsy shop today (http://www.etsy.com/shop/vickyalberto) with Dusty Attic chipboard - including many of the newest releases (see images below).


You can now follow my blog via e-mail (see right sidebar to subscribe) for updates. Thanks so much everyone for all your support in my crafting and retail as well. I really do read and appreciate every comment you leave me.

Here is a peek at just a few of the newest Dusty Attic:


Monday, February 11, 2013

Swirlydoos February Blog Hop


Welcome to Swirlydoos' "Upon a Time" Kit Reveal
Blog Hop Block Party!
If you came here from Rae's blog, then you are on the right track. If not, go back to Swirlydoos' blog and start from there. We have some amazing projects for you to see today. Make sure to leave a comment on all of the blogs for a chance to win a prize! Check out Swirlydoos on Facebook and Like Us too!

Well, this kit featuring the entire Graphic 45 "A Place in Time" collection (26 sheets of paper!) really gives paper crafters endless possibilities to create with. Oh there are so many color combinations to choose from! Here is a layout of my daughter as a baby. I have added some Dusty Attic chipboard (lacing tash and mini word title) from my stash to complement my kit layout. Click images for larger views.

Here is a close-up of the gorgeous pearl bling and fabric flowers this month!

I also used the beautiful kit sketch as inspiration for the layout above.

Next is a a layout of my son as a fun little toddler. Once again, I added some DA chipboard from my stash to complement the kit (snowflakes and scroll border).

Here is a close-up of the pretty blue kit flowers and my handmade ones too. I am working on a tutorial for these and will post it soon.

I used the Dusty Attic February sketch as inspiration for the layout above.

Lastly for today, I made a birthday gift box. Like I said, this kit has so many possibilities. I really love the variety of embellishments this month - so fun to work with!

I used this template to create my gift bag with a "unit" of 1.75 inches. Click image for larger view.
You have until midnight, eastern time, on Thursday, FEB. 14 to complete the hop. Winners will be announced on the Swirlydoos Blog on Friday 1/25. In order to qualify to win here is what you need to do:

1: Visit all of the blogs and leave a comment on each. This way we know you were there. Become a follower if you're not already. Take your time. There are REALLY beautiful things to see along the way.

2: Before you leave each blog, look for the “special” words and write it down.
Once you have visited all the blogs and collected all the special words, they will create a sentence.

3: Finally, go back to the Swirlydoos blog and leave a comment letting us know how much fun you had, tell us the sentence that was created with all of the special words you collected. Can't wait to hear from you.

My special word is : DIET

I will be back in a week or so with more kit projects too! Here is a peek at the "Upon a Time" main kit. To become a subscriber and never miss a gorgeous Swirlydoos kit click here.
The party continues over at Angelica's blog. Have fun!

NOTE: I used a lot of Helmar goodness to stick all of my projects together. I used the premium craft glue on the paper layers, the 450 quick dry on the flowers, the adhesive runner for the photos, Zapdots to add dimension, and the acid-free glue for all the chipboard pieces. Thank goodness for good glue!