With simply paper and creativity anyone can create art


Wednesday, September 11, 2013

Re-opened my Etsy Shop (DA Chipboard)


After the busiest summer of my life, I have re-opened my Etsy Shop

I have a decent amount of Dusty Attic chipboard in there (including some of the pieces from the last release). A little birdie told me there will be yet another brand new DA chipboard collection soon... but it won't be arriving here until late in the Fall.

Thursday, September 5, 2013

Swirlydoos September Blog Hop!


Welcome to the Swirlydoos "Gilted Pleasure"
September kit reveal blog hop party!

If you came here from Heidi's Blog, then you are on the right track. If not, go back to the Swirlydoos blog and start from there. We have some amazing projects for you to see today! Make sure to leave a comment on ALL of the blogs for a chance to win prizes for participation in this hop. Also, be sure to check out Swirlydoos on Facebook and "Like Us" too!

My first layout was inspired by the beautiful kit sketch (below) this month. The paper was perfect for this picture taken by my husband on our trip to Venice (12 years ago!).
Click on images for larger views

Here is a close-up of the pretty flowers and the gorgeous Dusty Attic chipboard I added to complement the kit. The chipboard was inked and then splattered with the gold Silks glaze in the kit.

Here is a peek at the sketch (I flipped it).

Next is a snap of my hubby and baby girl 5 years ago while camping. I've been wanting to scrap this one for a while and finally got around to it. Added a Dusty Attic clock from my stash to polish things off.

Here is a closer look. Pretty flowers and metal in this kit!

Lastly for today, I used a Lucky 8 punch to create a die cut to showcase my middle son as a baby on this layout. He is now 8 years old!

Take a look at the awesome dark green flowers and wood feathers in this kit!

You have until midnight, Eastern time, on Thursday 9/5 to complete the hop. Winners will be announced on the Swirlydoos Blog on Friday 9/6. In order to qualify to win here is what you need to do:

1: Visit all of the blogs and leave a comment on each. This way we know you were there. Become a follower if you're not already. Take your time. There are REALLY beautiful things to see along the way.

2: Before you leave each blog, look for the “special” words and write it down.
Once you have visited all the blogs and collected all the special words, they will create a sentence.

3: Finally, go back to the Swirlydoos blog and leave a comment letting us know how much fun you had, tell us the sentence that was created with all of the special words you collected. Can't wait to hear from you.

Here is a peek at the Swirlydoos main kit and add-ons. To become a kit subscriber click here. Go to www.swirlydoos.com to see more details about this beautiful kit.


My special word is: DEPENDS

The party continues over at LUMIN'ARTE's Blog.
Have fun!

Here is the order and blog addresses:
Swirlydoos CLICK HERE
Andie CLICK HERE
BLUE FERN STUDIOS CLICK HERE
Angelica CLICK HERE
Heidi CLICK HERE
Vicky YOU ARE HERE
LUMIN'ARTE CLICK HERE
Robin CLICK HERE
Paulien CLICK HERE
PRIMA CLICK HERE
Rae CLICK HERE 


Monday, September 2, 2013

Amazing Dusty Attic Chipboard PRIZE!


Look what's up for grabs from Dusty Attic this month. Just go to the Dusty Attic FACEBOOK page for details! 

This prize is worth a whopping $150.00 (whoooo-hoooo). Good luck!

Tuesday, August 27, 2013

More August Swirlydoos + Dusty Attic

My daughter has been begging me to make something for her with my August Swirlydoos "Passion Berry" kit. I used the kit papers and trims and altered a tissue box with plenty of beautiful Dusty Attic pieces. I used an entire set of Baroque Corners (DA0543 -- 6 in a set, 2 large and 4 small) plus a gorgeous frame from the ATC set #1 (DA0691 -- 3 different styles in a set) that fit perfectly over the hole.

Here is the full view from the front. The pearl and lace flower tutorial can be found HERE on my blog.

Here is the top view. All of the chipboard pieces were stippled with gesso and splattered with pink Silks glaze (in the Swirlydoos kit). A really easy shabby look to achieve.

Next, is a simple card made with kit scraps and flowers. Don't you just love the picket fence in this kit too?

This month's Dusty Attic ATC theme is "medieval" and I created mine to sit nicely in the middle of a card. I used more left overs from my August Swirlydoos kit and added lots of gorgeous chipboard pieces. 

Here is the ATC on its own. The background is actually the inside negative from an ATC frame #4 (DA0896), the lion head is from the Coat of Arms set #2 (DA0833), and the four corner pieces on the card are from the Moroccan Accents (DA0837). Once primed with gesso, I used a variety of metallic distress stains, crackle paint and inks to finish the chipboard pieces. I topped them all off with a little "royal" manly bling from the Swirlydoos kit.


Wednesday, August 14, 2013

4 new Swirlydoos (and Dusty Attic) projects!

I am back from holidays and ready to reveal some creations made with the amazing August "Passion Berry" Swirlydoos kit and some fabulous Dusty Attic chipboard too! This kit is so "pinkalicious" gorgeous and features beautiful IOD "Cotswald Manor" papers - love it!

Up first is my daughter eating her very first jelly filled donut. In addition to the glorious main kit and flower add-on I have also used a DA chipboard lace border and painted it with the Silks glaze in the kit, topped randomly with brown ink to darken it.

click on images for larger views.

This layout started off with the August Swirlydoos sketch but then took on a life of its own as I was creating it, LOL. Don't forget to enter the monthly challenge! It is open to anyone (you don't even need to be a kit subscriber!)

Next is a boy layout of my sons when they were younger enjoying a summer treat. I used a Lucky 8 punch for the border. I added a small left over piece of DA cherry blossom chipboard on here (primed and inked) and tucked a few DA mini roses among the pretty Kaisercraft ones in the kit. Don't you love that cute little white fence from the kit too?

I used this month's Dusty Attic sketch as inspiration. Don't forget to enter the DA monthly challenge!

Another layout of my cutie as a baby - don't mind the dirty camping dishes in the pic, LOL. These were  my favourite papers and flowers this month. I added a DA corner scroll and finished it with the Silks glaze in the kit, topped with red ink. I ADORE those pretty wooden doors in the kit too!

OK, so when my daughter (5 years old) saw all the pretty pink in this kit... she begged me to make her something. I used some left over trim and a flower to alter a headband from the dollar store. Easy to make and a nice result (and a happy child :)

Here is a peek at the Swirlydoos August 2013 "Passion Berry" main kit and add-ons. To become a subscriber and never miss a gorgeous Swirlydoos kit click here.

Sunday, July 28, 2013

My August Challenge (with a PRIZE!)

I am hosting a little challenge over on the Swirlydoos Kit Club Forum (it's FREE to join)  - and I am offering a fun *PRIZE* (see below). IMPORTANT NOTE: You don't need to be a Swirlydoos kit member to enter - we love to make new friends on our forum! ***The only catch is that your layout CAN'T be entered into another challenge of any kind.

WHAT YOU NEED TO DO:

#1 - Create a LAYOUT that you create using 2 or more techniques that YOU have NEVER done before... but have really wanted to try. 

#2 - Upload your layout in the "Vicky's August Technique" challenge thread on the FORUM and our online GALLERY no later than August 31st, 2013. (Don't forget to tell us the 2 techniques that you tried for the very first time!)

#3 - Post your layout to at least one online gallery of your choice or a social media like your blog or Facebook and mention the layout was created for "Vicky's Swirlydoos August Technique Challenge". (Don't forget to tell us WHERE you posted it too by sharing a link to it when you post on our Forum!)

*OPTIONAL: We'd love for you to look around the Forum and get to know you better by "chatting" with us online. Never hurts to make new scrappy friends (plus we have a lot of great tips and tutorials on there too :)

I used my leftovers from my Swirlydoos July "Madame" kit to create this layout and tried to push myself out of my comfort zone... and this layout certainly did that for me... paint, "goop" (AKA paste), bubble wrap stamping, whitewashing, a bit of grunge style and OMG no flowers for heaven's sake! BTW - the young boy in the photo is my dad with his dad (on the left) and two uncles.

Click on image for larger view
I used some fabulous Dusty Attic chipboard "brick wall" pieces, a mini word "remember" for the title and I used some awesome Dusty in Colour acrylic paints too! NOTE: If you would like to see how I made the brick wall, I showed a tutorial in my last post.

OK... I know you want to see the PRIZE now...
(all unopened items from my stash)

The winner will be chosen by random draw so anyone can win and I will ship anywhere in the world!

Can't wait to see what you create - good luck!

Friday, July 26, 2013

Dusty Attic Brick Wall TUTORIAL


Here is a little tutorial (and a sneak of my next layout)...


STEP 1 - I started off by painting the chipboard bricks with sunburnt orange and bisque Dusty Attic paint - trying to avoid the casing so they wouldn't get stuck in there. Then, I added some dark brown ink on top.

STEP 2 - I used snow writer  (by Deco Art) and randomly semeared it on - again trying to avoid the casing so they wouldn't get stuck in there.

STEP 3 - I went over all of it with light brown ink to blend the colours.

STEP 4 - I whitewashed it all with watered down gesso to give it a soft aged effect to suit my whitewashed project. NOTE: Omit this step if you are using on a darker layout.

STEP 5 - I added some of the bricks to my project and filled the spaces with the snow writer (easy to do since it has a really fine tip). Alternatively, you could slather on any paste of your choice and then set the bricks into it (but it's not a precise application that way). TIP: Use a toothpick to flatten in the groves a bit.

 I will be back soon with the new layout and a challenge/contest (with a PRIZE of course :)

Tuesday, July 23, 2013

Summer Display #2 (Swirlydoos)

Another Swirlydoos share for this month... made with just the "Madame" main kit contents and the flowers add-on... nothing else required! I have been loving the Kaisercraft paper and sticker elements in this kit - so very pretty. The vintage image is from Pion Design.


Here is a close up of the gorgeous flowers from the add-on kit (and I cut apart some sticker elements to surround them)...

I used this cute Kaisercraft Saturday Sketch July#2 as a starting point for my layout...

I will be back soon with a new layout, tutorial and challenge/contest (with a PRIZE of course :)

Friday, July 12, 2013

Summer Display Layout Tutorial (Swirlydoos)

The July Swirlydoos "Madame" main kit was so easy to create with - so many beautiful embellishments. These Prima and Kaisercraft papers look like they are already masked and stamped on too - so awesome! I decided to make this a summer display layout for my mantle so I used a stock image. Here is a tutorial of my layout made with just the MAIN kit contents - without any add-ons!

click on images for larger views

STEP 1 - PREPARE THE BACKGROUND
I cut a small bit off the edges (a quarter inch?) of the light Prima paper, heavily distressed it and adhered it to a darker Prima paper. TIP: Only glue the middle of the papers together, leaving 3 inches all around to be freely rolled back later on (easier to do this at the end).

STEP 2 - FUSSY CUT AND/OR DISTRESS YOUR LAYERS
I cut out a few photo mat layers (approx. 4x6 or 5x7 sizes) from the Kaisercraft papers (the frame and tan paper) and used the Prima flowers packaging as a layer too.

STEP 3 - START POSITIONING
I placed the 3 paper layers and one of the element sticker borders, plus a chipboard piece (splattered with gesso the Silks paint in the kit) on top of my background.

STEP 4 - ADD MORE EMBELLISHMENTS
I added more chipboard, sticker elements and a flower. The chipboard birdcage was treated with gesso, Silks paint (from a previous kit) and brown chalk ink. TIP: I fussy cut some of the sticker flowers apart.

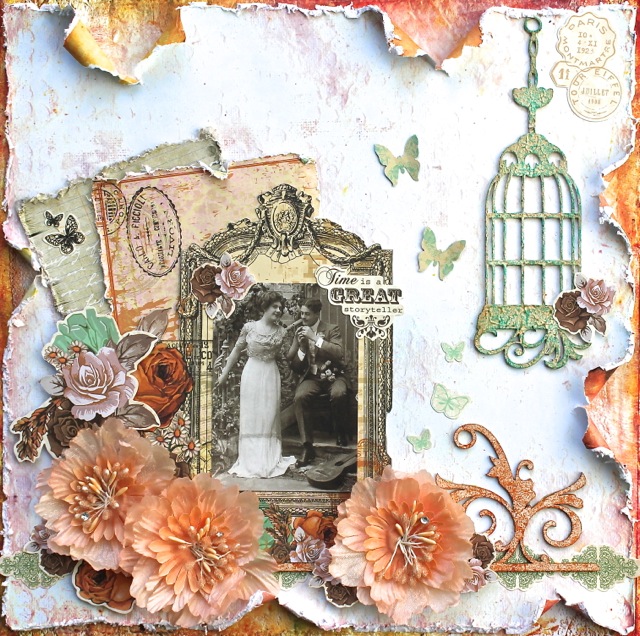
STEP 5 - THE FINISHING TOUCHES
I added the photo image, even more sticker elements (again fussy some apart), plus added more flowers, punched some butterflies (from kit scraps) and rolled back the edges in a few places.

STEP 6 - SECURE THE EDGES
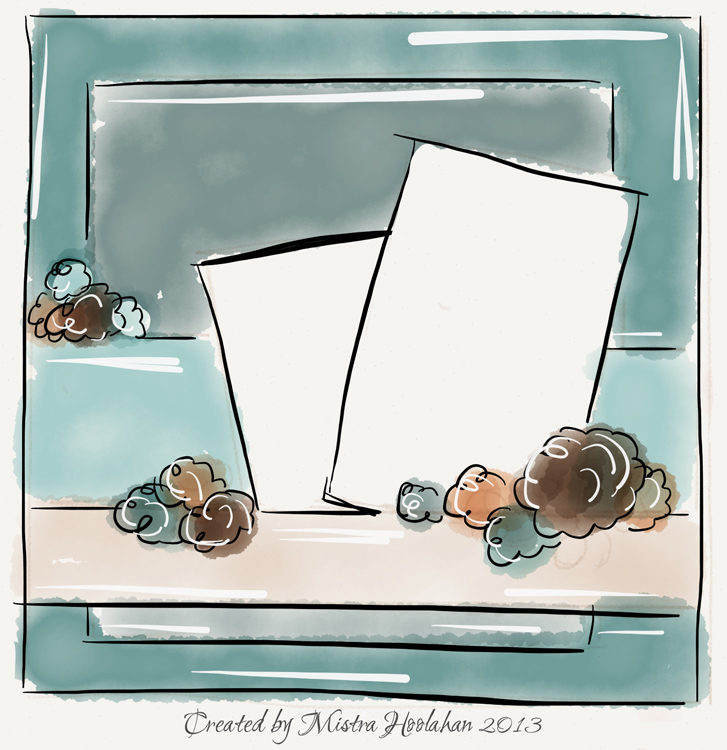
Lastly, I added a bit of glue in spots that were not rolled back to secure the edges of the layout. NOTE: I also used this month's stunning kit sketch as inspiration...

Here is a peek at the Swirlydoos July 2013 "Madame" main kit and add-ons. To become a subscriber and never miss a gorgeous Swirlydoos kit click here.

Monday, July 8, 2013

Swirlydoos July Kit Reveal Blog Hop

Welcome to the Swirlydoos "MADAME"
July kit reveal blog hop party!

If you came here from our EXTREMELY talented guest designer - Gerry's blog, then you are on the right track. If not, go back to the Swirlydoos blog and start from there. We have some amazing projects for you to see today! Make sure to leave a comment on ALL of the blogs for a chance to win prizes for participation in this hop. Also, be sure to check out Swirlydoos on Facebook and "Like Us" too!

Oh my... I have been waiting to get this "Madame" kit - delicious Prima and Kaisercraft papers with perfect embellishments. I am really "digging" teal and peach this season so this was my ultimate PERFECT kit! I decided to make this first project a summer display layout (for my fireplace mantle) so I used an elegant stock image (from Pion Design) instead of a personal photo.

Click on images for larger view.

Note that I have ONLY used the main kit contents for this layout and a step-by-step layout tutorial will be posted on the Swirlydoos forum later today. This is the amazingly beautiful kit sketch that I used as inspiration - so gorgeous!

Here is a close up of the yummy flowers in the main kit!

For my second layout, this is a picture of my dad posing with his family when he was just a little boy. They were re-united once immigrating to Canada from Portugal. I added some bits Dusty Attic chipboard flourishes and title from my stash but everything else is from the kit.


I used this Kaisercraft sketch (Saturday sketch for July #1) as inspiration -- so easy to make it "your own". I flipped it to better suit my photo.


Here is a closer view of details.

Lastly for today, I made a card using the kit contents (papers, flowers and bling) to surround my Dusty Attic "trinkets and treasures" themed ATC. I started off by using the casing from DA words and some mini shells.

Here is a close-up of the ATC portion surrounded by the amazing bling in the main kit.

You have until midnight, Eastern time, on Wednesday 7/10 to complete the hop. Winners will be announced on the Swirlydoos Blog on Thursday 7/11. In order to qualify to win here is what you need to do:

1: Visit all of the blogs and leave a comment on each. This way we know you were there. Become a follower if you're not already. Take your time. There are REALLY beautiful things to see along the way.

2: Before you leave each blog, look for the “special” words and write it down.
Once you have visited all the blogs and collected all the special words, they will create a sentence.

3: Finally, go back to the Swirlydoos blog and leave a comment letting us know how much fun you had, tell us the sentence that was created with all of the special words you collected. Can't wait to hear from you.

Here is a peek at the Swirlydoos "Madame" main kit and add-ons. To become a subscriber and never miss a gorgeous Swirlydoos kit click here. Got to www.swirlydoos.com to see more details about this beautiful kit.

My special words are: WHO
The party continues over at Lisa's Blog
Have fun!

I still have LOTS more of my kit to play with and will be back soon to reveal 3 more projects. Please note that some of these projects above are made with 80% the kit contents and a few items from my stash or past Swirlydoos kits.

Blog hop order:
Swirlydoos -CLICK HERE
Paulien -CLICK HERE
Andie -CLICK HERE
Angelica  -CLICK HERE
Irene -CLICK HERE
Rae Moses -Click Here
Gerry vanGent - CLICK HERE
Vicky - YOU ARE HERE!
Lisa V - CLICK HERE
Back to Swirlydoos!